
Wondering what diseases are caused by dirty water tanks? Discover the hidden health risks of stagnant water and how to clean your tank safely.
What Diseases Are Caused by Dirty Water Tanks? The Hidden Health Risks
Look, I get it, looking inside your water storage tank isn’t exactly high on your weekend to-do list. Out of sight, out of mind, right? We turn on the tap, the water looks clear enough, and we procced to brush our teeth, cook dinner, or take a shower without a second thought.
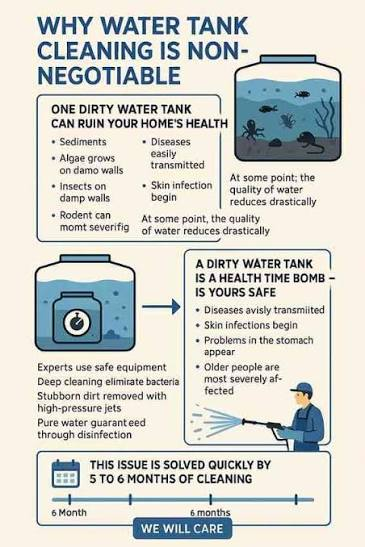
But here is the real talk about water safety: an unmaintained overhead or underground water tank is a ticking time bomb for your family’s health. Over time, dust blows in, birds drop contaminants near the vents, and a thick layer of slimy biofilm forms on the walls. This creates a perfect, dark breeding ground for invisible pathogens. If you have ever wondered what diseases are caused by dirty water tanks, the answers can be quite alarming—ranging from chronic stomach issues to severe, life-threatening respiratory infections.
Today, we are going to look closely at these hidden health risks and walk through exactly how you can clean your tank safely without wasting money on expensive professional services.
The Medical Reality: Contaminants Hiding in Your Tap
When water sits stagnant in a residential storage tank, it undergoes a process called stagnation. The chlorine added by municipal treatment centers gradually breaks down, leaving the water completely unprotected. Without a disinfectant, microscopic invaders multiply rapidly.
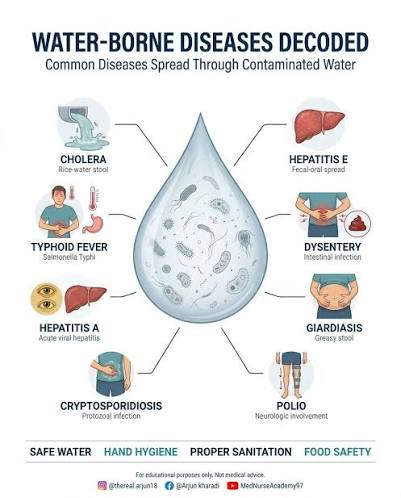
Understanding what diseases are caused by dirty water tanks requires looking at the specific bacteria, viruses, and parasites that thrive in neglected water systems.
Legionnaires’ Disease (Legionella Pneumophila)
This is perhaps the most dangerous bacterial threat hiding in stagnant water. Legionella bacteria thrive in warm, stagnant environments between 68°F and 122°F. You don’t even have to drink the water to get sick; Legionnaires’ disease is contracted when you inhale microscopic water droplets, such as their is a fine mist created while taking a hot shower. It causes a severe, sometimes fatal form of pneumonia.
Cholera and Typhoid Fever
While rare in modern municipal setups, these severe bacterial infections still break out in residential systems where underground tanks have tiny cracks that allow sewage or contaminated groundwater to seep in. Both diseases cause severe dehydration, high fevers, and intense gastrointestinal distress.
Gastroenteritis (E. Coli and Salmonella)
If your family suffers from frequent, unexplained bouts of stomach cramps, diarrhea, or vomiting, your water tank might be the culprit. Birds, lizards, or rodents often find their way into overhead tanks through broken lids. Their waste introduces E. coli and Salmonella directly into your household supply.
Parasitic Infections (Giardiasis and Cryptosporidiosis)
These parasites form hard protective shells, allowing them to survive for long periods in water tanks. They cause long-lasting diarrheal illnesses that resist standard antibiotics and can weaken the immune systems of children and elderly family members over several weeks.
Pathogen Breakdown: Symptoms and Risks
To help you identify potential water hygiene issues in your home, let us organize these common waterborne threats by how they impact your health.
| Disease / Pathogen | Primary Source in Tank | Common Symptoms | Severity Level |
| Legionnaires’ Disease | Stagnant biofilm, warm water, slimy walls | Severe cough, high fever, shortness of breath | High (Requires hospitalization) |
| Gastroenteritis (E. Coli) | Animal droppings, unsealed tank lids | Stomach cramps, watery diarrhea, nausea | Moderate (Dangerous for children) |
| Giardiasis (Parasite) | Accumulated sediment, organic sludge | Chronic bloating, fatigue, severe weight loss | Moderate to High (Long-lasting) |
| Typhoid Fever | Groundwater seepage through tank cracks | Sustained high fever, headaches, body aches | High (Requires immediate medical care) |
The Solution: A Preventive Tool Checklist
Knowing what diseases are caused by dirty water tanks should not cause panic—it should cause action. At TankClean.site, we firmly believe that regular maintenance is the ultimate vaccine for your home’s water supply.
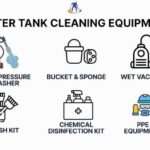
Before you begin the physical cleaning process, gather these essential tools to protect yourself from organic contaminants and harsh cleaning chemicales.
- Personal Safety: Rubber boots, long gloves, and a protective mask to avoid inhaling mold or heavy chlorine fumes in confined spaces.
- Scrubbing Brushes: Nylon bristle brushes with long extension handles. Avoid wire brushes because they create deep scratches in plastic or fiberglass tanks where bacteria can hide.
- Draining Submersible Pump: Essential for quickly pulling out dirty water and thick mud from the bottom of underground tanks.
- Sanitization Agent: Plain, unscented liquid household bleach (5% to 9% sodium hypochlorite concentration).
- Testing Kit: Chlorine test strips to ensure the water is completely flushed and safe for consumption after cleaning.
Step-by-Step Guide to Safely Cleaning Your Water Tank
You do not need to pay a premium to a commercial cleaning crew. By following this systematic DIY method, you can completely sanitize your home’s water distribution setup safely and effectively.
Step 1: Isolate the Plumbing System
Turn off the power supply to your electric or gas water heater to protect the internal heating elements from burning out while the system is dry. Close the main valve that supplies water into the storage tank.
Step 2: Empty the Reservoir
Open the main drain valve at the base of the tank. If your tank lacks an external drain, place your submersible utility pump into the water and run the discharge hose out to a safe drainage area away from your landscaping. Leave just a few inches of water at the bottom to help you mix up the mud and sediment.
Step 3: Scrub Away the Biofilm
Climb carefully into the tank (or use long-handled tools from the hatch if the opening is small). Vigorously scrub the walls, corners, and floor. Pay special attention to the waterline, where sticky green or black biofilm layers tend to accumulate. You can use a mixture of warm water and dish soap or white vinegar to break down stubborn mineral crusts.
Step 4: Vacuum the Sludge
Use a wet-dry vacuum or a bucket and sponge to pull out the thick, dirty slurry you just scrubbed off the walls. Do not wash this heavy sludge down your household pipes, as it can easily clog your bathroom or kitchen traps.
Step 5: High-Pressure Rinse
Rinse the interior walls thoroughly using a high-pressure garden hose nozzle or a portable pressure washer. Pump this rinse water out immediately until the floors and walls look completely spotless.
Step 6: Disinfect and Sanitize (Shock Chlorination)
Now we must kill the invisible bacteria responsible for the diseases we discussed earlier. Fill the tank about a quarter full with clean water. Add 1 cup of regular, unscented household bleach for every 100 gallons of your tank’s total capacity. Finish filling the tank with water so the mixing action is thorough.
Step 7: Flush and Sit
Go inside your home and open every tap until you smell a strong scent of chlorine, then shut them off. This pulls the sanitizing water through your entire pipe network. Let the solution sit undisturbed for a minimum of 8 to 12 hours. Do not use the water for drinking or washing during this time.
Step 8: The Final Flush
Drain the entire chlorinated tank completely. Refill it with fresh, incoming water and run your home taps for 5 minutes to wash out any remaining chemical traces. Use your test strips to check that the chlorine level is below 4.0 ppm before clearing the system for daily family use.
Keep Your Household Supply Protected
Understanding what diseases are caused by dirty water tanks highlights just how important water hygiene truly is. Scrubbing out a tank might require some physical effort, but it completely removes the threat of waterborne illness from your household.
Regular maintenance should be performed at least once every calendar year to keep your water crystal clear and completely pathogen-free.
Never guess when it comes to your family’s health. Download our comprehensive DIY Water Tank Inspection Checklist right now to guide you safely through your next home maintenance day. You can also sign up for our automated seasonal maintenance alerts on TankClean.site to receive helpful reminders exactly when your system is due for its next deep clean and rinse!