
Stinky, brown water at home? Learn how to fix muddy water coming from storage tank reservoirs using simple, expert-led DIY steps and tools.
How to Fix Muddy Water Coming From Storage Tank Reservoirs: The Ultimate DIY Guide
You turn on your bathroom faucet or go to fill up the kitchen sink, and instead of clear, crisp water, you get a murky, brown, muddy mess. It is an instant nightmare scenario that makes your stomach sink. Can you run your washing machine? Is it safe to wash your face or brush your teeth? Definitely not.
Look, I get it, scrubbing a tank is exhausting but ignoring brown, silt-heavy water can ruin your home appliances, clog up your plumbing fixtures, and create a massive breeding ground for harmful germs. You do not need to drop a small fortune hiring an expensive commercial cleaning service to clear this up. With a clear weekend afternoon, a few basic tools, and a step-by-step game plan, you can solve this problem entirely on your own.
Here is the real talk about water safety: muddy water means a massive accumulation of soil, silt, or rust has breached your system or settled at the base. Whether you have a brick-and-mortar underground cistern or a polyethylene plastic overhead tank, learning how to fix muddy water coming from storage tank systems is an essential skill that saves your pipes and protects your family. At TankClean.site, we want to give you the exact, expert-approved blueprints to clean your water supply safely, quickly, and independently.
Why is My Storage Tank Producing Muddy Water?
Before grabbing your boots, we have to diagnose exactly how that heavy sediment got into your clean water lines in the first place. Understanding the source helps you prevent it from happening again.
1. Municipal Supply Flushes or Well Collapse
If your home is connected to a municipal water grid, city workers occasionally flush out the main water lines, which dislodges years of rust and sand, pushing it directly into your property’s reservoir. Alternatively, if you rely on a private groundwater tube well, a damaged well screen can let fine sand and clay slurry pump right up into your primary storage container.
2. Broken or Loose Tank Lids
This is a classic issue for outdoor overhead units. If your tank lid is cracked, warped by the intense sun, or missing entirely, heavy rainstorms can wash atmospheric dust, bird droppings, and muddy yard runoff directly into your drinking supply.
3. Stirred Up Bottom Sludge Layer
Over months of continuous use, tiny invisible particles settle flat onto your tank floor, forming a thick, clay-like mud layer. When the tank runs completely empty and suddenly refills, the intense downward force of the incoming water stirs up that deep sludge blanket like a tornado, turning your entire water column brown.
Tool and Gear Checklist for Mud Removal
You cannot clear out heavy, thick mud with a basic household sponge. You need to gather the right gear to ensure the work is fast, effective, and sanitized.
| Equipment Group | Essential Tools | Purpose & Safety Function |
| Safety Equipment | Long rubber gloves, waterproof boots, and safety goggles. | Protects your skin and eyes from airborne pathogen mist and harsh chemicales splashes. |
| Water & Sludge Evacuation | Submersible utility pump or a heavy-duty wet-dry vacuum. | Quickly pulls out the heavily discolored, muddy residual liquid from the very bottom. |
| Mechanical Cleaning | Stiff-bristled nylon scrubbing brushes and a commercial pressure washer. | Blasts away the stuck-on clay, mineral scale, and slimy biofilms clinging tightly to internal walls. |
| Sanitizing Agents | Food-grade liquid sodium hypochlorite (unscented household bleach). | Thoroughly disinfects the internal structure, wiping out bacteria hidden beneath the mud layer. |
Step-by-Step Guide to Eliminating Mud From Your Tank
Ready to reclaim your pristine water supply? Follow this exact, structured sequence to drain the mud, scrub the internal surfaces, and sterilize your household plumbing network safely.
1.Isolate the Main House Plumbing System:Prerequisite Step.
Turn off the principal inlet valve supplying municipal or well water to the tank. Switch off the electrical power supply to your water booster pumps and your automated water heater breaker. Close the primary distribution valve leading into your house so that dirty, muddy wash water doesn’t travel down into your home faucets or indoor appliances during the deep clean.
2.Drain the Standing Water and Scoop Out Sludge:Duration: 30-45 mins.
Open the tank’s main external drainage valve to run out the loose, discolored water. Once the water level hits the bottom, drop a submersible utility pump or use a sturdy plastic bucket to physically scoop out the heavy, thick layer of brown silt and mud resting at the base. Keep a tiny bit of water in the tank to make it easier to liquefy and extract the dense clay sheets.
3.Scrub the Tank Walls and Pressure Wash:Cleaning Phase.
Mix a basic cleaning solution using warm water and a small amount of dish soap or vinegar. Use a medium-stiff nylon brush or a household pressure washer operating at 1,500 to 2,000 PSI to thoroughly blast the interior walls, ceiling, and floor from top to bottom. This knocks loose the sticky biological biofilms and brown dirt patches where bacteria love to breed. Immediately pump out the dirty wash water.
4.Apply a Shock Disinfection Treatment:Duration: 1-2 hours soak.
Refill the tank roughly 10% full with clean water. Add 1 gallon of regular, unscented household liquid bleach for every 1,000 gallons of total tank capacity to create a powerful sanitizing shock blend. Spray or sponge this solution across all interior walls and let it sit completely undisturbed for two full hours to ensure total biological sterilization. Technicians must wear appropriate masks during this chemicales application phase.
5.Flush and Empty Residual Chemical Liquids:Flushing Phase.
Drain the heavy chlorine solution out completely through your external waste line. Use a garden hose to rinse down the internal walls one final time with fresh water, and use a wet-vacuum or clean sponge to remove the very last puddle from the floor so your household tap water doesn’t retain a harsh pool-like smell later.
6.Refill, Inspect, and Turn Your System Online:Final Re-commissioning.
Close all external drainage valves completely and open your incoming municipal or well line to refill the unit with fresh water. Pop open the lid and verify that the water is completely crystal clear and odorless. Run an outdoor garden hose tap for one minute to clear out any small pockets of trapped air, and then safely procced to open the main distribution valve back into your residential property.
Permanent Upgrades to Prevent Mud From Returning
Now that your tank is completely pristine inside, let’s talk about a few smart preventative upgrades to ensure that muddy water never makes a comeback into your house.
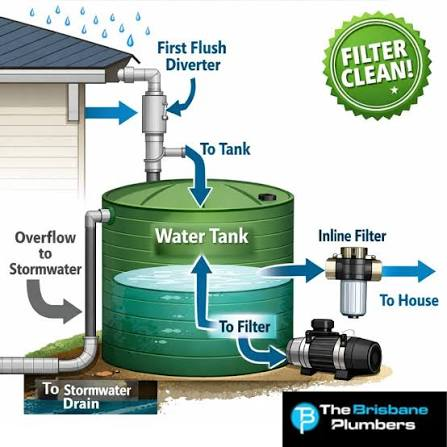
The single best defense against muddy water is installing a whole-house inline sediment filter right before the inlet pipe of your storage tank. A high-quality 5-micron sediment filter acts like a security guard, catching tiny sand grains, rust flakes, and silt particles while they are still inside the incoming pipe, completely preventing them from settling out and forming a heavy mud layer in your main reservoir.
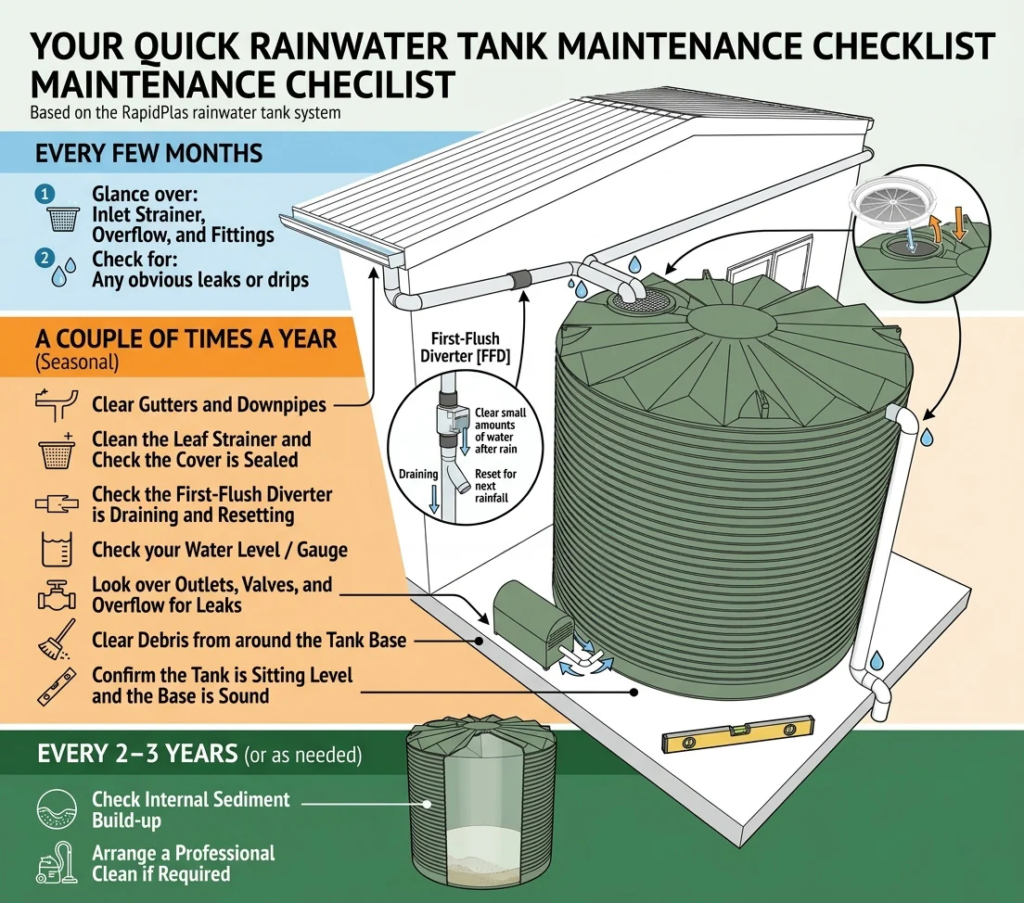
Secondly, build a habit of performing a quick “bottom-flush” every six months. Simply open your tank’s lowest drainage valve for 60 seconds while the reservoir is completely full. The massive weight of the water creates a natural siphon effect that sweeps away fresh, loose silt deposits before they have a chance to pack down, harden, and turn into a problematic thick layer of sludge. Always ensure your tank cover lid fits perfectly air-tight to block out rainwater dust runoff.
Master Your Home Water Hygiene with TankClean.site
You don’t need to live with discolored water or spend a fortune on specialized plumbing contractors when you have a clear, methodical DIY blueprint. By staying proactive and executing a regular maintenance rhythm, you can easily protect your household plumbing and ensure safe, healthy, and crystal-clear water for your family every single day. For more practical home care guides, expert troubleshooting articles, and step-by-step water hygiene advice, make sure to explore the vast array of resources available right here on TankClean.site—your premium online home for independent residential maintenance mastery.