

Notice a greasy sheen on your water supply? Discover what causes oily film on top of water tank water and learn how to fix it without hiring pros.
What Causes Oily Film on Top of Water Tank Water and How to Fix It
You look inside your residential storage tank and notice a strange, shimmering, iridescent sheen dancing across the surface of your domestic water supply. It looks exactly like gasoline or motor oil floating on a roadside puddle. Instantly, panic sets in. You start wondering if your groundwater is contaminated, or if someone accidentally spilled something toxic near your storage system.
Look, I get it, scrubbing a tank is exhausting but walking away from a greasy, rainbow-colored top layer is out of the question when your family’s health is on the line. Finding out what is lurking in your domestic water reservoir can be incredibly stressful, but you do not need to panic or call out an expensive plumbing contractor right away. Most of the time, this issue can be diagnosed and resolved safely using simple tools and techniques you can handle entirely on your own.
Here is the real talk about water safety: a shiny layer on top of your water is not always a toxic chemicales spill. Sometimes it is a completely natural, harmless biological byproduct, while other times it indicates a mechanical failure or an unsealed roof lid. Understanding what causes oily film on top of water tank water is the vital first step toward restoring crystal-clear, safe water to your household taps. At TankClean.site, we want to break down the science behind this common issue and give you a clear, expert-led roadmap to fix it independently.
The Diagnostics: Chemical Oil vs. Biological Bacteria
Before you start pouring cleaning solutions down your reservoir, you must determine whether you are dealing with real petroleum oils or a completely organic bacterial bloom. Luckily, there is a simple “stick test” you can perform in less than 30 seconds to know for sure.
Take a clean stick or a piece of hard cardboard and gently poke the shimmering surface layer inside your water reservoir.
- If the film shatters: If the sheen breaks apart into rigid, jagged, geometric plates like ice sheets and stays separated, you are dealing with Iron or Manganese Bacteria. This is an organic byproduct of harmless micro-organisms reacting with iron in groundwater.
- If the film swirls: If the sheen immediately flows back together smoothly like liquid silk after you pull out the stick, you are looking at a true petroleum, grease, or synthetic oil contamination.
What Causes Oily Film on Top of Water Tank Water?
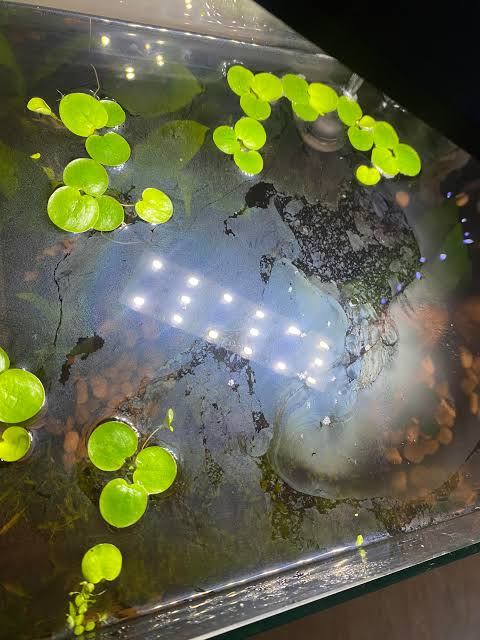
Once you have run your diagnostic test, we can look deeper into the primary reasons why these layers establish themselves on your domestic supply.
1. Iron and Manganese Oxidizing Bacteria
As mentioned above, if the film shatters during your stick test, iron bacteria are the primary culprits. When groundwater rich in dissolved iron sits stagnant inside a dark concrete or plastic reservoir, these harmless micro-organisms feed on the iron, oxidizing it. This metabolic activity leaves behind an organic, oil-like residue that floats directly to the top layer.
2. Leaking Booster Pump Seals or Float Valves
Many overhead and underground storage systems rely on mechanical ball float valves or submersible water pumps to manage liquid levels. If an internal gasket or motor seal begins to degrade over time, a tiny amount of factory-applied mechanical lubricant or grease can seep directly into your clean reserves. Since oil is lighter than water, even a single teardrop of mechanical grease will expand into a massive, highly visible surface sheen.
3. Runoff Contamination via Cracked Lids
If your storage system is located outdoors or underground beneath a driveway, an unsealed or cracked cover lid is an open door for contamination. During heavy downpours, rainwater can pick up engine oil drops, lawn fertilizer residues, or greasy organic tree pollen from your roof or courtyard, washing the whole mess directly inside their clean water pool.
Choosing the Right Treatment: Skimming vs. Shock Disinfection
Getting rid of a floating layer requires matching the correct treatment method to the specific cause. Using the wrong agent can make the taste of your water even worse.
| Contamination Type | Primary Action Strategy | Ideal DIY Cleaning Agent | Why It Works |
| Biological Biofilms & Iron Bacteria | Structural Shock & Oxidation | Unscented Liquid Chlorine Bleach | Oxidizes dissolved iron and completely destroys bacterial colonies on contact. |
| Mechanical Grease & Petroleum Slicks | Oil Absorption & Deep Skimming | Oil-Absorbent Polypropylene Pads | Hydrophobic material attracts and traps floating petroleum molecules while repelling water. |
| Organic Pollen & Atmospheric Silt | Manual Evacuation & Wall Scrubbing | White Vinegar & Mild Liquid Dish Soap | Breaks down oily botanical compounds safely without leaving harsh chemicales tastes behind. |
Step-by-Step Guide to Clean and Clear Surface Sheens
If your reservoir has developed a greasy appearance, follow this clear, step-by-step DIY sequence to evacuate the top layer, scrub the container walls, and restore pure water flow to your residential property.
1.Isolate Your Entire Plumbing System:Safety Setup.
Turn off the incoming water line from your municipal source or tube well. Switch off the electrical breakers to all booster pumps and hot water heaters. Most importantly, make sure to tightly close the primary water distribution valve leading directly into your home so no surface grease or oily residue accidentally migrates into your indoor faucets or kitchen lines.
2.Skim the Floating Surface Layer First:Duration: 15-20 mins.
Never drain a tank from the bottom while an oil film is sitting on top, or the grease will coat the entire interior wall structure as the water level drops. Use oil-absorbent pads or a clean, flat plastic bucket to skim the very top layer off first. If it is iron bacteria, a fine mesh skimmer net lined with paper towels works perfectly to catch the jagged plates.
3.Drain the Remaining Core Liquid Safely:Duration: 30-40 mins.
Once the floating surface sheen is entirely removed, open your lowest external waste or drain valve. Let the main body of clear water evacuate completely. If you are dealing with a flat-bottomed plastic or concrete design, drop a small submersible utility pump down to pull out the final inches of water resting on the floor.
4.Scrub the Interior Walls and Joint Seals:Mechanical Cleaning.
Mix a localized cleaning solution using warm water and a grease-cutting dish soap. Use a medium-stiff nylon bristle brush to wash down the walls, paying extra close attention to the high-water line where oil rings tend to stick. If your diagnostic pointed to iron bacteria, spray the walls thoroughly with a chlorine bleach blend to wipe out the hidden micro-organisms.
5.Flush the Internals with Fresh Water:Rinsing Phase.
Use a fresh garden hose to rinse the walls, ceiling, and floor from top to bottom. Pump out the dirty wash water immediately. Ensure you wipe away any soapy bubbles or loose residue from the base using a clean, non-abrasive sponge so your drinking water doesn’t taste like soap later.
6.Refill the Tank and Purge Home Lines:System Re-commissioning.
Close your external drainage valves completely and open your primary inlet line to refill the unit. Inspect the surface to confirm it is 100% crystal clear. Once satisfied, procced to open the main distribution valve back into your home. Turn on your kitchen and bathroom faucets for two minutes to flush away any pockets of stagnant air or old water remaining inside the domestic pipes.
Strategic Preventative Measures for Long-Term Clarity
Reclaiming your clean water supply is fantastic, but you want to put a few permanent defenses in place so that floating films don’t return next season.
If your issue was mechanical grease, check your household booster pumps and automatic float valves immediately. Swap out old, deteriorating rubber seals for high-grade, food-safe silicone gaskets that won’t leach oils or chemical lubricants into your drinking supply. Additionally, ensure your roof cover lid is completely air-tight and locked down tight so that windblown organic pollens, dust sheets, and rainwater runoff can never breach your tank’s perimeter.
For those dealing with chronic iron bacteria from private tube wells, installing a specialized inline sediment or iron-oxidation pre-filter right before the inlet pipe is a game-changer. This ensures that heavy iron deposits are caught and neutralized before they ever have a chance to settle inside your primary domestic tank. If you ever need more advanced advice on selecting household filtration systems or managing deep concrete cisterns, remember that TankClean.site is always here to provide reliable DIY guidance.
Take Control of Your Residential Water Supply
You do not need to feel defeated by a strange surface sheen or drop your hard-earned money on emergency plumbing bills when you have a clear, expert-approved plan. By understanding the underlying causes and executing a routine, strategic maintenance schedule, you can easily ensure your household water remains perfectly clear, odor-free, and completely safe for your loved ones every single day.
To help you maintain a flawless home maintenance schedule, explore our comprehensive collection of DIY guides and deep-clean articles available right here on TankClean.site—your premium online resource for independent home care and total water hygiene mastery.