
Found a dead rat, bird, or lizard in your water supply? Here is exactly what to do if dead animal is found in water tank setups to fix it safely.
What to Do If Dead Animal Is Found in Water Tank
It is the absolute ultimate household nightmare. You open up your overhead or underground water storage tank for a routine check, or maybe you noticed a strange, slightly sweet smell coming out of your bathroom tap. You look inside with a flashlight, and their it is: a dead rat, a bird, or a lizard floating right in your family’s water supply. Look, I get it, discovering a carcass in your drinking water is utterly sickening, terrifying, and completely exhausting to think about cleaning up. But right now, you need to put the panic aside. It is time to act quickly, methodically, and safely.
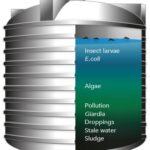
When an animal gets trapped and decomposes inside a residential water reservoir, it introduces millions of highly dangerous pathogens—such as Salmonella, E. coli, and various parasites—directly into your plumbing lines. Knowing what to do if dead animal is found in water tank systems can literally save your household from a massive medical crisis.
Here at TankClean.site, we give you the raw, unfiltered truth about water hygiene. You do not need to call an expensive professional sanitation service and spend a fortune to resolve this issue. With a clear mind, some rugged safety gear, and the correct chemical disinfectants, you can completely sterilize your home water network all by yourself.
Immediate Emergency Measures: Stop the Spread
The moment you make this discovery, your very first action must be mechanical isolation. Do not wait until you have the time to clean the tank to shut off the system.
- Turn Off the Main Distribution Valve: Instantly shut the valve that leads from the tank down into your home plumbing. This traps the highly toxic water inside the tank and prevents it from moving further down your pipes.
- Alert the Household: Make sure every single family member knows that the water is completely toxic. Do not use it to brush teeth, wash hands, wash dishes, or take a shower until the entire decontamination process is finished.
- Disconnect Internal Filters: If you have RO filters, UV purifiers, or washing machines connected to the line, keep them turned off so contaminated water does not destroy their internal elements.
Evaluating the Decontamination Weapons: Bleach vs. Hydrogen Peroxide
To completely wipe out the intense bio-contamination left behind by a decaying animal, mild natural cleaners like white vinegar will not cut it. You need hard-core oxidizers to guarantee total sterilization.
| Disinfectant Type | Active Compound | Killing Efficacy against Carcass Pathogens | Residual Tracking |
| Liquid Household Bleach | Sodium Hypochlorite (5%-6%) | Extremely High; destroys bacterial cell walls, viruses, and biological odors within minutes. | Easy to trace and monitor using cheap pool test strips. |
| Industrial Hydrogen Peroxide | Hydrogen Peroxide (35% Food Grade) | High; leaves no chemical smell behind and breaks down cleanly into oxygen and water. | Harder to test accurately at home; significantly more expensive. |
For a critical contamination emergency involving a dead animal, household liquid bleach remains the gold standard recommended by global health organizations. Let us get your tools sorted so you can procced to clean this up like a pro.
Step-by-Step Guide: How to Decontaminate Your Water Storage Tank
Do not skip any part of this process. When dealing with biological decay, shortcutting your cleanup can leave hidden bacterial biofilms behind.
Step 1: Remove the Carcass Safely
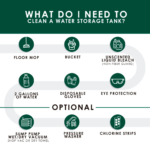
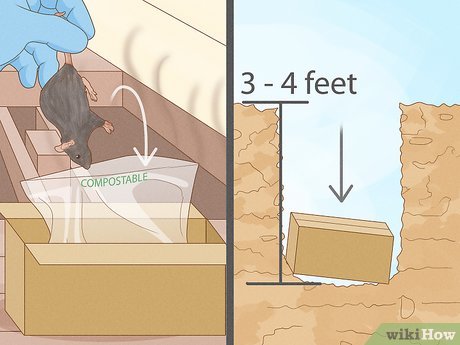
Put on thick rubber gloves, safety goggles, and a heavy-duty face mask to protect yourself from airborne pathogens and intense odors. Use a pool skimmer, a long-handled net, or a sturdy bucket to carefully scoop the dead animal out of the tank. Place the carcass directly into a heavy-duty plastic garbage bag, tie it tight, and dispose of it safely outside your property lines. Throw away the net or tool you used, or disinfect it heavily with pure bleach afterward.
Step 2: Flush Out the Contaminated Liquid
Connect a submersible utility pump to a long discharge hose and drain the entire volume of contaminated water completely out of the tank. Route this water straight down a municipal sewer drain or an isolated gravel area. Do not pump this fluid onto your garden beds or grassy lawns, as the heavy load of bacteria can foul your topsoil and attract flies.
Step 3: Scrape the Organic Biofilm and Sludge
A dead animal accelerates the growth of a sticky, foul-smelling layer of biological film along the floors and walls. Mix a solution of heavy-duty dish soap and hot water in a bucket. Get a stiff nylon scrubbing brush and scrub every single inch of the interior walls, joints, and seams. You must physically scrape off the slime, or the bacteria underneath will survive the upcoming chemical shock. Pump out the dirty, soapy residue and rinse the walls down completely with a high-pressure hose until the floor is totally bare.
Step 4: Run a High-Strength Shock Chlorination
Ordinary cleaning isn’t enough when a dead pest is involved; you must perform an aggressive shock chlorination. Fill the tank completely with fresh water. To handle a severe biological breach, you need a concentration of roughly 50 parts per million (PPM) of chlorine.
Calculate your dosage using this simple rule: add 1 to 1.5 liters of unscented household liquid bleach for every 1,000 liters of tank capacity. Mix it thoroughly into the water body.
Step 5: Disinfect the Household Piping Network
Open your main distribution valve into the house. Go to every single faucet, showerhead, and flush tank in your home. Run the taps for 2 to 3 minutes until you smell a very strong, pungent scent of chlorine chemicales coming out of the tap, then shut them off. This forces the heavy disinfectant mixture to sit inside your internal home pipes, completely sterilizing any decayed material that might have trickled into the plumbing lines before you turned off the water. Let the entire system sit undisturbed for a minimum of 12 to 24 hours.
Step 6: Final Rinse and Safe Testing
After the long contact time has passed, pump the entire chlorinated mixture out of the tank. Refill the reservoir completely with fresh, clean water. Go back inside your house and open all your taps full blast for 10 minutes to flush out the high-strength bleach lines.
To ensure the water is completely safe for daily use, purchase a basic pack of chlorine test strips. Dip a strip into a fresh cup of tap water. The free chlorine level must register under 2.0 parts per million (PPM) before anyone uses the water for drinking, cooking, or bathing.
Critical Mistakes to Avoid in a Carcass Cleanup Emergency
When taking matters into your own hands, keep these vital safety factors in mind:
- Working inside the Tank Alone: Decomposing animals generate pockets of toxic gases like methane and hydrogen sulfide inside enclosed concrete or plastic tanks. Never climb completely inside a tank to scrub without having a second person standing right outside the hatch keeping close watch on you.
- Ignoring the Entry Point: If a rat or bird managed to get inside your tank, it means your lid is broken, loose, or your air vents are wide open. If you do not install a tight threaded cover and high-quality stainless steel mesh over your overflow pipes right now, another animal will fall inside within a few weeks.
- Failing to Flush the Hot Water Heater: Highly contaminated water can get trapped inside your hot water heater tank. If you only flush your cold water lines during the final cleanup phase, you will release active bacteria back into your shower lines the moment someone takes a hot bath.
Your Home Hub for Professional-Grade Water Hygiene
Finding a dead animal in your water supply is incredibly stressful, but it is an issue you can definitively conquer with methodical preparation and the right sanitizing steps. By executing a deep physical scrub and a rigorous shock chlorination process, you can fully restore your home’s water purity without spending thousands on professional cleanups.
For more detailed chemical conversion tables, step-by-step bug-proofing blueprints, and DIY home care advice, check out our extensive library of guides right here on TankClean.site. We are committed to making residential water safety accessible, clear, and highly affordable for every household.
Ready to completely protect your water storage setup from future pests? Download our free Ultimate DIY Water Tank Maintenance & Bug-Proofing Checklist today to secure your entry hatches, or subscribe to our monthly newsletter below to receive automated seasonal cleaning reminders and expert home care tips straight to your inbox!