

Master the step by step concrete water tank cleaning method safely at home. Clean your underground or overhead cement tank without hiring pricey pros!
Step by Step Concrete Water Tank Cleaning Method: The Ultimate DIY Guide
Look, I get it, scrubbing a tank is exhausting but putting off this chore is a massive risk to your family’s health. Concrete water tanks, whether they are massive underground reservoirs or elevated overhead structures, are notorious for collecting grime. Unlike smooth plastic tanks, concrete has a porous, rough surface. This means it acts like a sponge for dirt, calcium scale, and microscopic pathogens.
Here is the real talk about water safety: if you can see a dark ring of sludge at the waterline or if your tap water has a faint earthy smell, you are already living on borrowed time. Algae, bacteria like E. coli, and harmful sediments love nothing more than settling into the tiny cracks and crevices of a concrete wall.
But do not panic and do not pick up the phone to call an expensive professional cleaning crew just yet. In this guide, we are breaking down the definitive step by step concrete water tank cleaning method so you can handle this project safely, effectively, and entirely on your own.
The Concrete Challenge: Why Cement Tanks Are Different
If you have ever cleaned a plastic tank, you need to throw most of that playbook out the window. Concrete behaves completely differently. Because it is highly porous, organic matter can root itself deep within the material.
Furthermore, concrete tanks leach minerals into the water over time, leading to a hard, white crust known as limescale. To tackle these issues, you need stronger abrasion, specialized tools, and a bit more patience. Fortunately, the team at TankClean.site has spent years perfecting these methods so you don’t have to learn the hard way.
Crucial Safety Rules for Concrete Tank Cleaning
Before we talk about scrubbing brushes, we must address the hazards of working with concrete structures. Underground cement tanks are classified as confined spaces. They can trap dangerous gases and experience rapid oxygen depletion.
The Buddy System is Non-Negotiable
Never, under any circumstances, climb inside an underground concrete tank without a spotter standing directly outside the hatch. Your spotter should have a thick rope and a flashlight, ready to assist or call for help if you feel faint or dizzy.
Proper Ventilation
Before you enter the tank, leave the main hatch wide open for at least 24 hours to vent out any trapped gasses. If possible, set up an electric fan at the opening to blow fresh air down into the workspace while you are inside.
Chemical Safety
Concrete cleaning often requires chlorine bleach or heavy-duty detergents to kill embedded roots and bacteria. Always wear a high-quality respirator mask, heavy rubber gloves, and protective goggles to guard against chemicales and fumes in the enclosed space.
Your DIY Tool and Material Checklist
Do not start draining your water supply until you have every single item on this checklist ready to go right next to the tank entrance.
Required Equipment
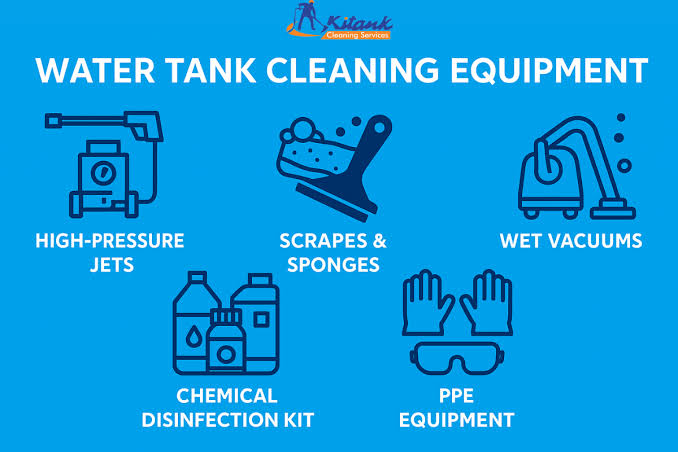
- Wire brush or heavy-duty scrubbing brush: Necessary for digging into the rough concrete pores.
- Submersible sludge pump: Essential for removing the heavy mud and sandy grit that settles at the bottom.
- Wet-dry shop vacuum: For pulling the final layer of dirty water out of the concrete texture.
- Safety ladder: Ensure it is securely anchored against the concrete lip.
- Personal Protective Equipment (PPE): Rubber boots, gloves, goggles, and a respirator mask.
Cleaning Solutions Comparison
Depending on how long it has been since your last cleaning session, you have a few choices for your cleaning and disinfecting agents.
| Cleaning Agent | Best Used For | Application Method |
| Liquid Detergent + Warm Water | Removing initial surface slime and loose mud. | Applied with a nylon brush during the first wash phase. |
| High-Strength Chlorine Bleach | Deep disinfection and killing embedded algae spores. | Diluted with water, sprayed onto walls, and left to sit. |
| Vinegar / Mild Acid Solution | Dissolving stubborn calcium scale and white mineral crusts. | Applied directly to rough patches to loosen the bond. |
The Step by Step Concrete Water Tank Cleaning Method
Let us procced to the actual, actionable phase of the project. Follow these steps precisely to ensure your concrete tank is thoroughly sanitized without causing structural damage to the plaster lining.
Step 1: Isolate the Water Supply and Drain
Start by turning off the main electrical switch to your automatic water pump so it does not run dry and burn out the motor. Next, close the outlet valve that delivers water to your home’s internal plumbing. This prevents dirty debris from rushing down into your geysers, washing machines, and drinking taps.
Open the scour or drain valve at the lowest point of the tank. Let the clean water empty out completely. If you want to conserve water, direct this initial clean outflow into your garden or lawn using a flexible hose line. Leave just an inch or two of water at the very bottom to help liquify the heavy silt.
Step 2: Remove the Heavy Sludge and Silt
Concrete tanks accumulate a heavy layer of dark, sandy silt over time. Use your submersible sludge pump to clear out the bulk of this mud. If their is still thick sand or clay stuck to the floor, use a plastic shovel and a heavy bucket to manually scoop it out of the hatch. Getting the loose dirt out of the way now means you won’t just be smearing mud around during the scrubbing phase.
Step 3: Scrubbing the Porous Walls (The Manual Phase)
Now it is time for the real muscle work. Mix a solution of heavy-duty liquid detergent and warm water. Using your wire brush or stiff-bristled brush, scrub the walls vigorously from the top ceiling downward to the floor.
You need to apply firm pressure to make sure the bristles penetrate the tiny pockets in the concrete. Pay extra attention to any visible hairline cracks or joint lines, as these are the exact spots where biofilm loves to anchor itself.
Step 4: High-Pressure Rinsing
If you have a high-pressure washer, this is where it shines. Blast the walls with clean water to wash down the soapy residue and loosened algae. However, keep the spray nozzle at least 12 to 18 inches away from the concrete wall. High pressure can chip away old, brittle cement plaster if you hold the wand too close, creating rough spots that will trap even more dirt next time.
Step 5: Vacuuming the Contaminated Residue
Use your wet-dry shop vacuum to suck up the dirty pool of soapy, muddy water that has gathered on the tank floor. Concrete floors are never perfectly flat, so you will need to move the vacuum nozzle slowly across the surface to pull moisture out of the small depressions. Use clean rags or large sponges to wipe the floor completely dry.
Step 6: Deep Disinfection (The Chlorine Wash)
Scrubbing cleans the surface, but disinfection kills the invisible microscopic pathogens hidden inside the porous cement. Mix a disinfection solution using household liquid bleach (around 5% chlorine concentration). A common standard is adding 1 gallon of bleach for every 500 gallons of your tank’s total capacity.
Fill the tank roughly one-quarter full with fresh water, pour in the calculated bleach, and then fill the rest of the tank to mix it thoroughly. Let this strong chlorinated mixture sit undisturbed for 4 to 6 hours. This extended contact time is crucial for concrete because the chemical needs time to soak into the material and neutralize deeply embedded organic spores.
Step 7: Final Flush and Neutralization
Drain the entire volume of chlorinated water through your discharge line. Do not dump this heavy chlorine water into your garden or local storm drains, as it can damage plants and local wildlife. Run fresh water along the walls one final time to rinse out any residual bleach smell. Keep flushing until your nose can no longer detect that sharp swimming pool scent.
Step 8: Refill and Reactivate
Close your drain valve tightly, double-check that no tools or rags were left inside, and secure the access hatch. Open the main inlet valve to fill the tank with pristine, fresh water. Once the tank is completely full, reopen the distribution valve to your home and turn your automatic pump system back on.
Pro-Tips for Long-Term Concrete Tank Maintenance
To keep your concrete storage system in peak condition between deep cleans, keep these industry secrets in mind:
- Inspect the external seal: Look for tree roots growing near your underground tank. Roots can break through concrete walls to reach water, introducing external bacteria into your clean supply.
- Keep the vents screened: Ensure all air vents and overflow pipes are covered with a fine, stainless-steel mesh to keep mosquitoes, lizards, and frogs from falling in.
- Monitor the plaster lining: Every time you clean the tank, check for peeling or crumbling cement plaster. If the structural concrete underneath is exposed, it will degrade rapidly.
Master Your Home Hygiene with TankClean.site
Taking care of a concrete water storage system requires effort, but learning the correct step by step concrete water tank cleaning method keeps your family safe and ensures your home runs smoothly without unexpected plumbing crises.
For more definitive DIY maintenance guides, water hygiene tips, and step-by-step breakdowns, make TankClean.site your permanent home resource. We are committed to helping you maintain clean, safe, and crystal-clear water all year round.
Don’t let your water safety slide to the back burner! Click here to download our comprehensive Concrete Water Tank Maintenance & Safety Checklist directly from TankClean.site. Sign up for our seasonal reminder newsletter today, and we will send you timely email alerts when it is time for your next inspection, along with exclusive expert tricks to protect your plumbing system!