How to Clean Plastic Water Tank at Home Safely: The Ultimate DIY Guide

Learn how to clean plastic water tank at home safely with our step-by-step DIY guide. Ensure pure, germ-free water without expensive pros!
How to Clean Plastic Water Tank at Home Safely: The Ultimate Expert Guide
Look, I get it. Crawling inside a dark, cramped space or standing under the scorching sun to scrub a giant cylinder is probably not your idea of a fun weekend. It is exhausting, messy, and frankly, a chore most homeowners kick down the road until the water coming out of the tap starts smelling a bit funky or looking slightly yellow.
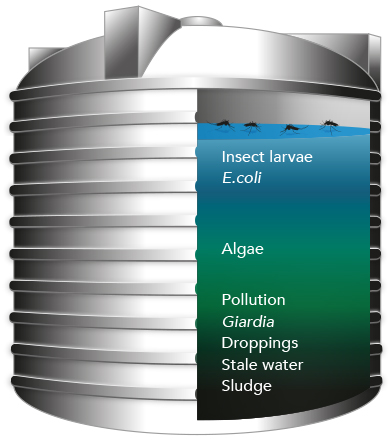
But here is the real talk about water safety: that plastic tank sitting on your roof or buried underground is the literal lifeline of your home. It stores the water you use to brush your teeth, wash your dishes, cook food, and bathe your kids. Over time, sediment settles at the bottom, algae creeps up the walls, and a slimy layer called biofilm forms. If you ignore it, you are essentially bathing in and consuming a breeding ground for bacteria.
The good news? You do not need to shell out hundreds of dollars for expensive professional cleaning services. In this comprehensive guide, we will walk you through exactly how to clean plastic water tank at home safely, saving your wallet while protecting your family’s health.
Why Water Tank Maintenance Can’t Wait
A lot of folks assume that because municipal water or well water goes through a filtration system, the storage tank stays pristine. That is a massive misconception. Wind blows dirt through tiny vents, insect eggs find their way in, and stagnant water naturally fosters microbial growth.
Regular cleaning—ideally every six months—prevents waterborne illnesses such as diarrhea, cholera, and skin irritations. By learning the proper techniques on TankClean.site, you can easily maintain a pristine water supply with just a few basic household tools.
Safety First: Crucial Pre-Cleaning Precautions
Before we dive into the scrubbing portion, we need to talk about safety. Working with water, electricity, and confined spaces can pose real risks if you are careless.
Confined Space Hazards
If you are cleaning a massive underground tank or an overhead tank large enough to climb into, never work alone. Always have a “spotter” standing outside the tank. Harmful gases can sometimes accumulate, or the oxygen levels can drop. If you feel dizzy, get out immediately.
Electrical Safety
You will likely be working with a submersible pump or a pressure washer. Water and electricity are a deadly combo. Ensure all extension cords are rated for outdoor use, keep plugs away from standing water, and turn off the main power supply to the tank’s automatic pumping system before you start.
Protective Gear
Do not skip out on personal protective equipment (PPE). Wear rubber boots to prevent slipping, heavy-duty rubber gloves to protect your hands from disinfectants, and safety goggles so stray drops of chlorinated water don’t splash into your eyes.
The DIY Tool Checklist
You cannot do a stellar job without the right gear. Gather these items before you turn off your water valve so you aren’t running back and forth to the hardware store mid-job.
Essential Equipment
- Stiff-bristled brush or clean broom: For scrubbing the walls without puncturing the plastic.
- Submersible mud pump or a heavy-duty bucket: To drain the residual sludge.
- High-pressure washer (Optional): Highly recommended for blasting away stubborn algae.
- Clean rags and sponges: For wiping down the final residue.
- Flashlight or headlamp: To clearly see the interior corners.
Disinfection Options: Bleach vs. Vinegar
When it comes to killing off bacteria and viruses, you have options. Most pros use chlorine bleach because it is highly effective, but some homeowners prefer eco-friendly alternatives like white vinegar. Let’s look at how their stack up against each other.
| Feature | Chlorine Bleach (Sodium Hypochlorite) | White Vinegar (Acetic Acid) |
| Sanitizing Power | Exceptionally high; kills 99.9% of bacteria, viruses, and algae. | Moderate; kills common bacteria but ineffective against tough viruses. |
| Safety Profile | Requires careful handling; strong fumes; must be flushed completely. | Safe to handle; mild fumes; completely non-toxic if trace amounts remain. |
| Cost | Very inexpensive and readily available. | Inexpensive, but requires much larger quantities for big tanks. |
| Best Used For | Heavy algae infestation, neglected tanks, or annual deep cleans. | Routine maintenance of lightly soiled tanks or sensitive households. |
Step-by-Step Guide: How to Clean Plastic Water Tank at Home Safely
Now that you have your tools ready and understand the safety protocols, let us procced to the actual cleaning process. Follow these steps methodically to get a sparkling clean tank.
Step 1: Isolate and Drain the Tank
First, shut off the inlet valve that feeds water into the tank. You also want to close the outlet valve that leads into your home’s plumbing network; you definitely do not want dirty, muddy water running down into your bathroom taps and hot water heaters during this process!
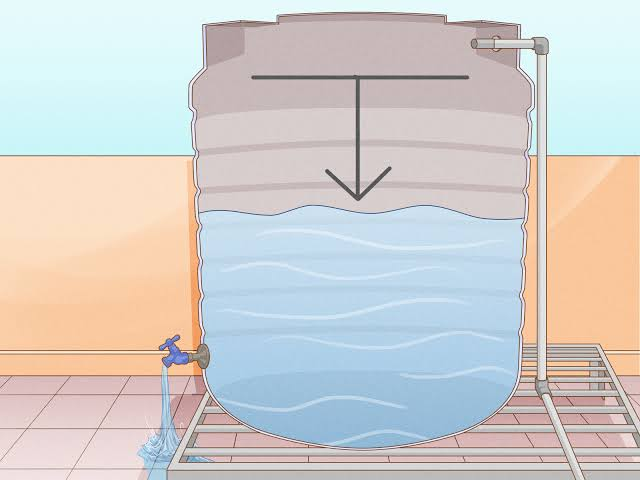
Open the drain valve or scour valve at the bottom of the tank to let the bulk of the clean water empty out. You can use this water to water your garden or wash your car so it does not go to waste. Leave a few inches of water at the very bottom to help you slurry up the mud.
Step 2: Sludge Removal
Once the tank is mostly empty, you will see a thick layer of dark sediment sitting at the bottom. Use a squeegee, shovel, or a heavy bucket to scoop out the thickest parts of the mud. If you have a submersible mud pump, this part becomes a breeze—just drop it in and let it pump the sludge out through a discharge hose away from your home’s foundation. Wiping away the loose dirt now makes scrubbing much easier later.
Step 3: Scrubbing the Walls and Floor
This is where the real elbow grease comes in. Take your stiff-bristled brush and start scrubbing the walls from top to bottom. If the stains are stubborn, apply a mixture of liquid detergent and warm water.
If you are lucky enough to own a high-pressure washer, use it here. Blast the walls systematically, keeping the nozzle about 12 inches away from the plastic to avoid causing structural damage. Pay special attention to the corners, joints, and around the inlet/outlet pipes where slime loves to hide.
Step 4: The Deep Clean Vacuuming
After scrubbing, you will be left with a dirty pool of soapy, grimy water at the bottom of the tank. Use your submersible pump or a wet-dry shop vac to remove every last drop of this dirty water. Take a clean sponge and wipe down the floor until there is no standing water left.
Step 5: Disinfecting the Tank
Scrubbing removes the visible dirt, but disinfection destroys the invisible pathogens. If you choose to use chlorine bleach, calculate the volume of your tank. A good rule of thumb for deep disinfection is adding around 50 parts per million (ppm) of chlorine. For a standard 500-gallon tank, this equates to roughly 1 gallon of household liquid bleach (5% to 6% strength).
Fill the tank about one-quarter full with clean water, pour in the bleach, and then top off the tank so the chemicales mix thoroughly. Leave this chlorinated solution to sit in the tank for at least 2 to 4 hours. This gives the chlorine ample time to sanitize every square inch of the plastic surface.
Step 6: Rinsing and Flushing the System
After the disinfection period has passed, drain the chlorinated water entirely through the drain valve. Do not drain this into your garden, as the high chlorine concentration will kill your plants.
Once empty, fill the tank with fresh water again and flush it out one more time. Keep rinsing until the distinct smell of chlorine completely dissipates. You can test the water quality or simply trust your nose—if it smells like a public swimming pool, it needs another rinse.
Step 7: Refilling and Restoring Power
Your tank is now officially clean! Close the drain valve tightly, open the main inlet valve, and let the tank fill up with fresh, clean water. Once it is full, you can safely reopen the outlet valve leading into your home. Don’t forget to flip the circuit breaker back on for your automatic water pumps.
Common Pitfalls to Avoid During DIY Cleaning
While the process is straightforward, it is easy for beginners to make mistakes that compromise their water quality. Here are a few things to keep in the back of your mind:
- Using the wrong brushes: Never use wire brushes or metallic scouring pads on a plastic tank. They scratch the interior polyethylene walls, creating microscopic grooves where bacteria can anchor themselves even deeper in the future.
- Neglecting the tank lid: People clean the inside but completely forget the lid. If the underside of your lid is covered in mold, every condensation drop that falls back into your water will re-contaminate it. Scrub the lid thoroughly!
- Forgetting the pipes: While the disinfectant is sitting in your tank, open your home’s taps for a few seconds until you smell chlorine, then shut them. This pulls the sanitizing solution into the household pipes, cleaning their interior lines as well.
Keep Your Water Pure with TankClean.site
Cleaning your plastic water tank might feel like a daunting task the first time around, but once you get a rhythm down, it becomes a simple weekend habit. Taking control of your home’s water hygiene ensures that your family stays safe from nasty, preventable illnesses.
For more expert DIY home maintenance advice, water safety data, and seasonal upkeep reminders, make sure to bookmark TankClean.site. We are dedicated to providing homeowners with the reliable information they need to keep their water systems running flawlessly.
Ready to make your next cleaning day completely stress-free? Click here to download our free, printable Water Tank Maintenance Checklist & Schedule Tracker directly from TankClean.site. Sign up for our monthly newsletter today, and we will send you gentle email alerts when it is time for your next flush, along with exclusive tips to extend the lifespan of your plastic tanks!