
Best Way to Clear Thick Sludge From Water Tank Bottom: DIY Guide

Tired of muddy home water? Learn the best way to clear thick sludge from water tank bottom reservoirs safely using easy, low-cost DIY methods.
Best Way to Clear Thick Sludge From Water Tank Bottom Reservoirs: The Master Blueprint
Let’s be completely honest for a second: out of all the household chores on your weekend to-do list, checking the inside of your water storage tank is probably at the absolute bottom. But if you have noticed a drop in your indoor water pressure, a slight muddy tint in your bathwater, or a weird earthy smell when you turn on the kitchen tap, it’s time to face reality. There is a very high chance that a thick layer of heavy, dark muck has settled at the base of your reservoir.
Look, I get it, scrubbing a tank is exhausting but allowing years of decomposed organic matter, sand, and pipe rust to sit in your water supply is a recipe for disaster. This heavy buildup doesn’t just ruin the taste of your morning coffee; it actively clogs up your internal plumbing valves, damages expensive water heaters, and forms a cozy blanket for dangerous bacteria to breed under. The good news is that you don’t need to empty your wallet hiring expensive commercial cleaning services. With a few smart tools and a solid game plan, you can clear this mess out entirely on your own.
Here is the real talk about water safety: clearing mud out of a deep tank requires a strategy that doesn’t involve just pushing the dirt further down into your household pipes. Whether you are dealing with a dark concrete underground cistern or a plastic overhead unit baking in the sun, finding the best way to clear thick sludge from water tank bottom areas is a skill that saves you thousands in long-term home repairs. At TankClean.site, we want to break down the job into simple, manageable steps so you can handle your own water hygiene like an absolute pro.
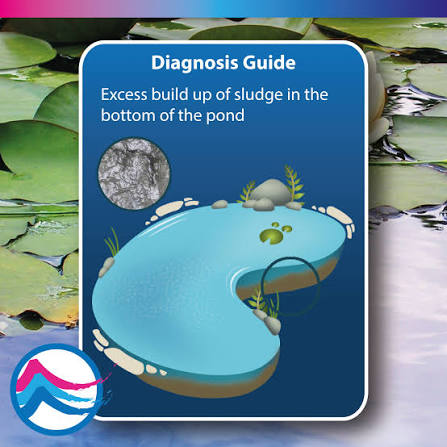
Why Does Sludge Accumulate at the Bottom of Your Tank?
Before we dive into the physical cleaning methods, we need to understand exactly what this mud consists of. Sludge isn’t just generic dirt; it is a complex, progressive buildup of multiple indoor and outdoor elements.
Fine Atmospheric Dust and Silt Infiltration
No matter how tightly you think your water storage tank lid is sealed, microscopic airborne dust particles, sand grains, and pollen manage to find their way inside through air vents or tiny structural gaps. When fresh municipal or well water enters the tank, these tiny solid particles slowly lose momentum, sink through the water column, and settle flat on the floor. Over months of continuous operation, this forms a dense, clay-like layer.
Pipe Scale and Corroded Metallic Precipitates
If your municipal water grid relies on older iron water mains, or if your home uses older galvanized steel plumbing connections, microscopic pieces of rusted metal scale continually flake off into the water path. Once this heavy metallic material reaches your residential storage vessel, it sinks instantly to the base, adding a gritty, dark orange or black texture to the organic muck.
Equipment Analysis: Manual Scooping vs. Submersible Sludge Pumps
When planning how to extract multiple gallons of dense, wet mud from a confined space, choosing the right tool determines whether the job takes two hours or an entire exhausting weekend. Let’s look at how the two primary DIY extraction strategies compare.
| Operational Metrics | Manual Scoop & Bucket Method | Submersible Sludge/Trash Pump |
| Physical Effort Level | Exceptionally high; requires continuous bending, manual lifting, and physically scooping heavy wet mud out of the access hatch. | Very low; the mechanical motor does all the heavy pulling, lifting, and transferring work for you automatically. |
| Time Efficiency | Slow and tedious; can take several hours depending on the total diameter and volume of the storage tank floor. | Rapid; can evacuate up to 30 or 40 gallons of dense, gritty liquid slurry per minute. |
| Gritty Solid Handling | Excellent; a plastic scoop can pick up large stones, thick clay sheets, and floating twigs without jamming. | Dependent on pump design; requires a specialized “vortex impeller” or a trash pump rating to handle solid debris without burning out. |
| Best Suited For | Small, shallow overhead plastic tanks where the total layer of sludge is less than a quarter-inch thick. | Deep concrete underground cisterns or large reservoirs where a massive volume of heavy mud has solidified. |
Step-by-Step Guide to Clearing Deep Tank Sludge Safely
Ready to reclaim your home’s water quality? Gather your equipment, read through these steps carefully, and let’s transform your domestic water supply.
1.Isolate the Main Domestic Plumbing System:Prerequisite Step.
Turn off the primary inlet line valve that fills up your tank. Head immediately to your home’s main water distribution valve and close it tightly. This step is absolutely critical because you must ensure that none of the loose, stirred-up mud or future cleaning chemicals travel down into your home’s kitchen faucets, bathroom showers, or washing machines while you are cleaning. Turn off the power breakers to all automated water booster pumps and heaters.
2.Drain the Clean Upper Water Layer:Duration: 30-45 mins.
Open the regular drain valve to run out the clear water sitting above the mud layer. Stop draining once the remaining water level drops to roughly 2 or 3 inches above the sludge line. Keeping a tiny bit of water in the tank makes it significantly easier to break up and liquefy the dense, sticky mud so it can be extracted efficiently.
3.Break Up and Pump Out the Thick Sludge Layer:The Extraction Phase.
Take a long, clean plastic paddle or a stiff broom and stir the bottom of the tank vigorously. You want to mix the thick mud with the residual water to form a uniform, fluid slurry. Drop your heavy-duty submersible sludge pump directly into the thickest part of the muck. Direct the pump’s output hose far away into an external garden drainage area or a storm sewer. Turn the pump on and let it evacuate the heavy slurry from the floor.
4.High-Pressure Mechanical Wall and Floor Blast:Duration: 20-30 mins.
Once the primary volume of mud is out, use a household pressure washer operating at 1,500 to 2,000 PSI to blast the entire internal surface area from top to bottom. Strip away the clear, slippery biofilm layer and stubborn dirt patches clinging to the walls. Spray all the loose wall debris down to the floor, and use your utility pump or a wet-dry vacuum to clear away the final puddles of dirty wash water.
5.Apply a Chemical Sanitizing Disinfection Mist:Duration: 1 hour soak.
Clearing the physical dirt is only half the battle; you must now kill the microscopic bacteria that were living underneath the mud. Mix 1 gallon of unscented regular liquid household bleach for every 1,000 gallons of total tank capacity with clean water. Spray or sponge this solution across all internal surfaces and let it sit for one hour. Afterward, perform a thorough final clean water flush to rinse away all chemicales residues.
6.Refill, Inspect, and Bring Your System Online:Final Re-commissioning.
Close all external drainage valves completely and open your incoming municipal or well valve to refill the unit with fresh water. Check the surface to make sure it looks completely crystal-clear and odorless. Run an outdoor garden hose tap for one minute to clear out any small pockets of trapped air, and then safely procced to reopen the main distribution valve back into your residential property.
Permanent Strategies to Reduce Future Sludge Buildup
Now that your tank floor is so clean you could practically eat off of it, let’s talk about how to make sure you never have to deal with a massive mud mountain ever again.
The single best upgrade you can make to your home water network is installing a high-flow sediment filter directly onto your incoming water line, right before the water enters your main storage tank. A heavy-duty sediment filter acts like a security guard, catching tiny sand grains, rust flakes, and silt particles while they are still in the pipe. It is significantly easier and cheaper to spin off a small filter cartridge and rinse it under a tap every few months than it is to climb inside a dark water reservoir to scoop out hundreds of pounds of dense mud.
Secondly, build a habit of performing a quick “bottom-flush” every six months. Simply open your tank’s lowest drainage valve for 60 seconds while the tank is full. The intense downward weight of the water creates a natural siphon effect that sweeps away fresh, loose silt deposits before they have a chance to compact, harden, and turn into a problematic thick layer of sludge.
Take Control of Your Home Maintenance with TankClean.site
Keeping your residential facility running smoothly doesn’t mean you need to rely on expensive external contractors or complicated machinery. By understanding the physical mechanics of sediment accumulation and utilizing simple, methodical DIY extraction techniques, you can guarantee crisp, clean, and perfectly safe water for your entire family every single day. For more practical home care blueprints, expert troubleshooting articles, and step-by-step water hygiene advice, make sure to dive into the extensive library of resources available right here on TankClean.site—your premium online home for independent residential maintenance mastery.