
Stop the green slime! Discover the best way to clean algae out of water tank systems safely using our expert, step-by-step DIY removal guide.
Best Way to Clean Algae Out of Water Tank: The Complete DIY Elimination Guide
Let’s be entirely honest for a second: opening up your home’s water storage lid and finding a thick, green layer of slime staring back at you is a total nightmare. Algae growth is one of those frustrating domestic problems that sneaks up on you during the hot, sunny months. One day your water feels perfectly fine, and the next, it carries a strange, swampy odor and an unappealing tint that makes you think twice about brushing your teeth.
Look, I get it, scrubbing a tank is exhausting but ignoring a full-blown green bloom inside your primary domestic reserve is a massive gamble with your family’s health. Here is the real talk about water safety: algae isn’t just an aesthetic issue. It forms a living, breathing ecosystem that feeds dangerous bacterial colonies like E. coli, ruins expensive inline sediment filters, and eventually clogs up your entire household pipe infrastructure.
You don’t need to spend a fortune hiring commercial high-pressure wash crews to fix this problem. With the right strategy, a few basic household supplies, and this expert framework from TankClean.site, you can reclaim your water purity. Let’s break down the best way to clean algae out of water tank systems once and for all.
The Science Behind the Green Slime: Why Algae Forms
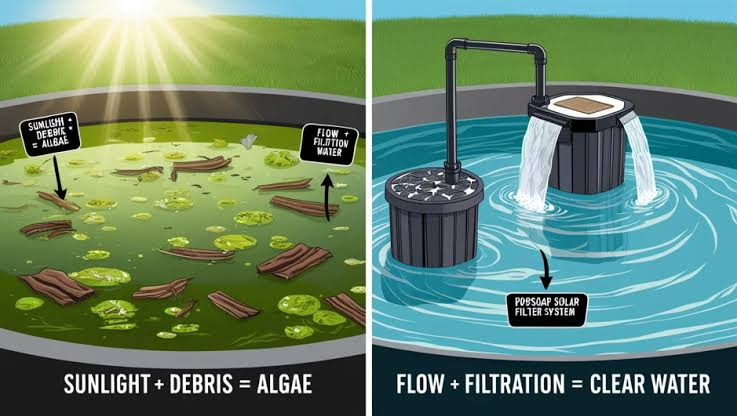
To permanently defeat algae, you have to understand exactly what makes it thrive. Algae aren’t like standard dirt or mud that simply settles from incoming municipal pipes; they are living photosynthetic organisms.
The Sunlight Catalyst
Algae require two primary ingredients to colonize your overhead or underground plastic unit: nutrients (which enter via wind-blown dust or raw tap supply) and sunlight. If your storage system has a loose, warped hatch cover, or if it is made of cheap, translucent white or green plastic that allows light to penetrate, you have essentially built a perfect backyard greenhouse.
The Hidden Biofilm Shield
When algae establish a foothold on plastic or concrete surfaces, they create a slippery microscopic barrier known as a biofilm. This film acts like a protective shield. If you simply pour a bucket of water down the hatch without physically breaking that film apart, the roots will stay anchored, and the green bloom will return in full force within less than two weeks.
Choosing Your Battle Weapon: Chemical Treatments Compared
You cannot simply use standard lawn moss killers or industrial copper sulfates to treat a domestic unit because those chemicales are incredibly toxic for human consumption. You must choose sanitizing agents that kill the plant cells on impact but can be rinsed out completely to leave zero toxic residue behind.
Algae Treatment Breakdown: Liquid Bleach vs. Food-Grade Hydrogen Peroxide
| Feature Metric | Pure Unscented Liquid Bleach | Food-Grade Hydrogen Peroxide (7%+) |
| Algae Destruction Power | Extremely High (Oxidizes plant cells on contact) | High (Foams up to lift deep roots out of porous concrete) |
| Residual Odor | Strong chemical smell (Requires multiple final flushes) | Completely Odorless (Breaks down into pure water and oxygen) |
| Structural Impact | Safe for HDPE plastic; can slightly degrade weak rubber seals | 100% safe for all structural tank materials and gaskets |
| Cost Factor | Incredibly budget-friendly and widely available | Slightly higher cost; typically sourced from specialty stores |
Essential Tool Checklist for Algae Removal
Before climbing up your access ladder, make sure you have the proper gear organized. Having the right mechanical leverage is what ensures you strip the algae out completely down to the bare walls.
- A Long Telescopic Extension Pole Brush: Look for medium-stiff nylon bristles. Never use metal wire brushes, as they create microscopic scratches where future algae spores can hide out of reach.
- Pure Unscented Chlorine Bleach or Hydrogen Peroxide: Your primary sanitizing agent.
- A High-Volume Submersible Utility Pump: Essential for evacuating the contaminated green slurry quickly.
- A Wet/Dry Shop Vacuum: For drawing up the final persistent sheets of slime from the bottom floor basin.
- Safety Goggles and Nitrile Gloves: To protect your skin and eyes from chemical splashback during heavy scrubbing.
- A Hand-Held Compression Sprayer: Excellent for applying a concentrated sanitizing mist directly onto dry walls.
Step-by-Step Guide: The Best Way to Clean Algae Out of Water Tank Systems
Now that your gear is arranged on your workspace, let’s execute the remediation process. Follow this step-by-step structural blueprint to ensure every single spore is completely neutralized.
Step 1: Complete System Isolation
Before touching any water lines, turn off the electricity to your water pump controllers and household filtration units. Close the main distribution valve that routes water from the storage tank down into your residential plumbing framework. This step is non-negotiable; you must ensure that zero green slime sheets or concentrated cleaning chemicals slip down into your bathroom showers or kitchen taps during the agitation process.
Step 2: Evacuate the Bulk Water Volume
Drop your submersible dirty-water utility pump down into the lowest section of the tank floor. Run your discharge hose out toward a local garden patch or storm drain. Let the pump evacuate the water until there are only about 3 to 4 inches left at the very base. Keeping a tiny bit of water at the bottom gives you a fluid base to mix your initial scrubbing solution.
Step 3: Mechanical Wall Scrubbing and Biofilm Disruption
Mix 2 cups of pure unscented liquid bleach into a 5-gallon bucket of clean water. Dip your telescopic pole brush into this mixture and start scrubbing the interior walls systematically from the top down. Work in tight, overlapping circular patterns to tear the slippery green biofilm sheets away from the tank surface. Let the loose green muck cascade down toward the floor basin.
Step 4: Vacuum the Green Slurry
Once all the walls and structural support pillars are stripped clean, turn your utility pump back on to pull out the bulk green slurry. Because pump suctions fail in shallow water, switch to your wet/dry shop vacuum to finish the job. Use the wide squeegee attachment to draw up the remaining green sludge from the corners until the raw plastic or concrete floor is fully exposed and bone dry.
Step 5: Concentrated Sanitizer Spray and Contact Window
Fill your hand-held garden compression sprayer with a potent mixture of 1 part bleach to 5 parts clean water. Liberally spray this solution across every single internal square inch of the tank, including the underside of the top access lid. Do not rinse it away immediately.
Big Brother Tip: Leave this mixture on the dry walls for a minimum of 2 to 3 hours. This extended contact window is what destroys the invisible, microscopic algae roots on a cellular level, ensuring they cannot regenerate.
Step 6: Final Structural Rinse and Re-Commissioning
After the sterilization window has passed, use a high-pressure garden hose to thoroughly wash down the walls from the top down, forcing any remaining chemical traces to the floor. Use your shop vacuum to suck up this final rinse fluid so that none of it stays behind to affect your drinking water quality.
Inspect the entire interior with a bright flashlight to confirm it looks hospital-clean. Once satisfied, procced to climb out, remove your tools, and secure the access lid down as tightly as possible. Open your main inlet valves to fill the unit up with fresh water, restore power to your home lines, and enjoy pure water!
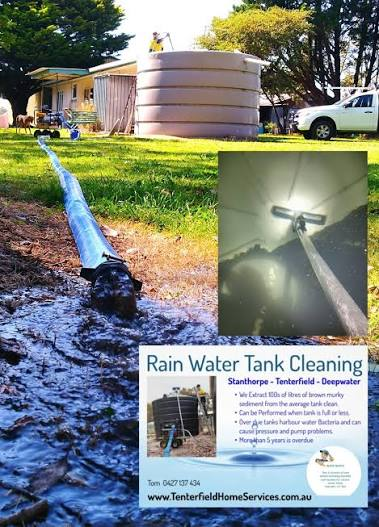
Proactive Strategies to Keep Algae from Returning
Executing the best way to clean algae out of water tank systems is only half the battle; your final step is ensuring the spores cannot establish a new colony. Implement these three professional prevention tactics:
- Blackout the Light Transmission: If you own a single-layer white or translucent plastic tank, sunlight will constantly trigger new algae blooms. The ultimate solution is to paint the entire exterior surface of the tank with a coat of solid black UV-resistant paint, followed by a topcoat of white reflective paint to keep the water cool. Completely blocking out the light kills their ability to grow.
- Upgrade Your Lid Gaskets: A surprising amount of airborne algae spores and organic dust enter systems because of warped, cracked, or loose hatch covers. Replace missing gaskets instantly to maintain an airtight seal against the elements.
- Maintain Consistent Water Turnover: Stagnant water in hot weather is an open invitation for biological growth. Try to size your storage unit according to your actual daily usage so fresh, chlorinated municipal water cycles through the tank every 24 to 48 hours.
Reclaim Complete Control Over Your Domestic Hygiene
Taking the time to master this algae eradication protocol is an incredibly valuable skill that keeps your household safe, self-reliant, and completely free from professional service inflation. By taking charge of your home infrastructure, you gain 100% certainty regarding the health and safety of the water flowing into your home’s cooking pots, baths, and laundry appliances.
For more authoritative DIY water hygiene blueprints, specialized equipment reviews, and step-by-step home maintenance advice, think of TankClean.site as your primary online knowledge library. We specialize in converting complex domestic engineering tasks into simple, logical, and scannable guides that any homeowner can master with confidence.
Ready to protect your home’s water reserve? Click the button below to subscribe to our seasonal maintenance newsletter community today! You will receive a fully downloadable, printable DIY Algae Prevention Checklist & Chemical Dosage Guide to keep right in your home toolbox, alongside automated seasonal notifications helping you inspect your domestic infrastructure before peak summer heat hit your neighborhood.