
Discover how to treat black mold inside plastic water tank reservoirs safely without hiring pros. Easy, expert-led DIY sterilization steps.
How to Treat Black Mold Inside Plastic Water Tank Systems Permanently
Finding dark patches creeping along the inner lining of your home’s water supply is enough to make anyone panic. When you look inside and realize those dark spots are a living colony of fungus, the situation becomes incredibly urgent. You use this water to wash dishes, bathe your kids, and run your daily household.
Look, I get it, scrubbing a tank is exhausting but ignoring a fungal infestation is a recipe for serious health risks and terrible odors. Many homeowners assume their only option is to throw away the whole unit or hire expensive commercial cleaning services that charge an absolute premium. The truth is, you do not need to spend huge amounts of money. With a few hours over the weekend, the right safety gear, and a proper disinfection strategy, you can completely eradicate the problem on your own.
Here is the real talk about water safety: mold spores love damp, dark environments, and polyethylene plastic tanks exposed to heat are prime real estate. Simply rinsing the tank out with a garden hose will not cut it because mold forms a stubborn roots-like matrix on porous surfaces. To keep your family safe, you need to learn exactly how to treat black mold inside plastic water tank systems using a methodical sanitizing approach. At TankClean.site, we specialize in providing practical, real-world DIY guides so you can take total control of your home water hygiene.
Why Black Mold Grows Inside Polyethylene Tanks
Fungal growth does not appear out of nowhere. It requires a specific set of environmental triggers to take hold inside a plastic storage unit.
Stagnant Water and High Temperatures
If your water usage is low, or you have a large backup tank that sits idle for weeks, the water becomes stagnant. When hot summer sunlight beats down on a non-insulated plastic exterior, the internal water temperature rises. This warm, stagnant environment acts like a greenhouse incubator for airborne spores that sneak inside.
Airborne Contamination and Loose Lids
Every time water is pumped out, air must enter the tank to equalize pressure. If your lid is loose, cracked, or completely missing, microscopic mold spores float in alongside dust and debris. Once their are organic nutrients at the bottom of the container, the spores attach to the plastic walls and start expanding rapidly.
Material Checklist: Bleach vs. Vinegar vs. Hydrogen Peroxide
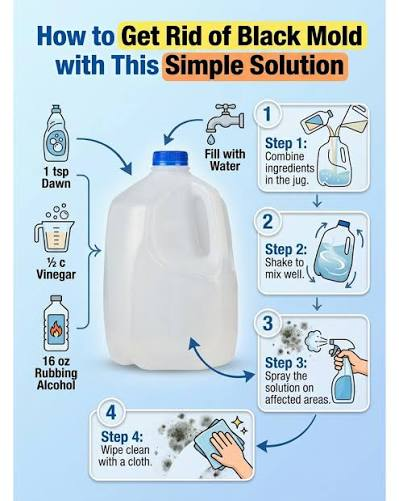
When fighting a tough fungal colony, selecting the proper chemical agent is half the battle. Let’s compare the most common DIY cleaning agents to see which one works best for heavy plastic sanitation.
| Cleaning Agent | Pros | Cons | Expert Recommendation |
| Liquid Chlorine Bleach | Highly potent, fast-acting, oxidizes organic matter completely, and destroys spores on contact. | Leaves a strong chemical odor if not flushed perfectly; requires careful handling. | Best for severe black mold. It is the industry standard for complete water tank sterilization. |
| White Vinegar (Acetic Acid) | Safe, completely non-toxic, eco-friendly, and naturally breaks down light mineral scaling. | Much slower reaction times; less effective against deep, widespread structural mold infestations. | Good for light, routine maintenance cleans, but not strong enough for deep black mold shocks. |
| Hydrogen Peroxide (3%) | Excellent anti-fungal properties, breaks down cleanly into water and oxygen without chemicales smells. | Requires massive volumes to treat large household storage tanks effectively, making it very expensive. | Ideal for small spot-treatments or minor point-of-use storage containers. |
Step-by-Step Guide to Treat and Eradicate Black Mold
Before starting, make sure to equip yourself with a high-quality N95 respirator mask, safety goggles, and thick rubber gloves. Breathing in loose mold spores or heavy chemicales fumes during a deep scrub is incredibly dangerous.
1.Isolate Your Plumbing System and Power Supply:Safety Prerequisite.
Shut off the main incoming water line feeding into your plastic tank. Flip the circuit breaker to turn off any water pumps or automated water heaters to prevent them from running dry. Most importantly, close the main distribution valve leading into your house so that contaminated mold spores and cleaning agents don’t accidentally travel down your home lines.
2.Drain the Tank Fully below the Fungal Line:Duration: 20-30 mins.
Open your lowest external drain valve to empty out the stored water supply. If you have a deep underground cistern or a flat-bottomed overhead plastic tank, use a submersible utility pump or a dedicated wet-dry vacuum to draw out the last few inches of stagnant water and loose sludge resting at the bottom.
3.Scrub the Mold Colonies Manually:Mechanical Scrubbing.
Mix a concentrated scrubbing solution of warm water and dish soap. Use a medium-stiff nylon bristle brush to vigorously scrub away all visible black patches from the walls, ceiling, corners, and internal pipe inlets. Do not use an overly abrasive wire brush, as scratching the plastic creates tiny micro-grooves where future mold can hide even deeper. Rinse and pump out this dirty water immediately.
4.Apply a Deep Shock Chlorine Sterilization:Duration: 2 hours minimum.
Refill the plastic tank about 10% to 15% with clean water. Pour in 1.5 gallons of regular, unscented household bleach for every 1,000 gallons of total tank capacity. Use a clean pressure sprayer or a long-handled mop to coat every internal square inch of the plastic structure with this potent mixture. Leave it sealed for at least two full hours so the chlorine can completely destroy the mold’s cellular roots.
5.Flush the Residual Disinfectant Out:Rinsing Phase.
Drain the entire shock solution through your external drain line. Use a garden hose connected to a fresh supply to wash down the ceiling and side walls thoroughly until the strong, pungent bleach aroma starts to fade. Vacuum out the absolute last drop of water from the floor of the tank using a clean sponge.
6.Refill the System and Flush Individual Taps:System Restoring.
Close the drainage line, reopen your primary intake valve, and let the tank fill back up completely with fresh water. Once full, procced to open the main distribution valve to your house. Go to every indoor faucet, showerhead, and kitchen sink, and run the water for 2-3 minutes to clear out any old water trapped inside your lines, ensuring completely sanitized water flows everywhere.
Long-Term Prevention Tactics for Plastic Tanks
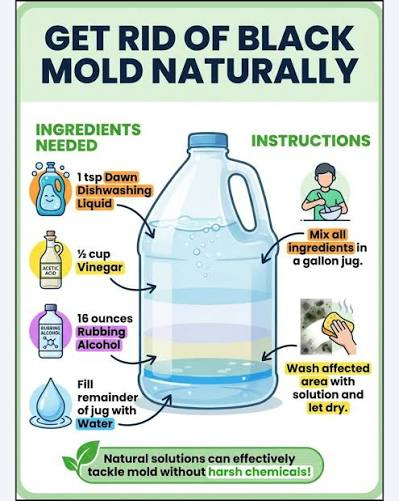
Once your water supply is clean and clear, you want to make sure the fungal colony never returns. A few smart adjustments can save you from ever having to repeat this intense scrubbing process.
First, check your lid alignment. A loose or poorly fitting cap allows sunlight to creep in, which fuels photosynthetic organic growth. Upgrade to a heavy-duty, threaded, air-tight lid that keeps out both sunlight and windblown mold spores. If your plastic tank has single-layered white or translucent walls, consider shading the unit or painting the exterior with a dark, UV-resistant coating to block out ambient light entirely.
Second, establish a simple seasonal disinfection schedule. Instead of waiting for visible black spots to appear, pour a minor maintenance dose of food-grade sanitizing solution into your tank every six months. This minor preventative step stops micro-spores from forming a complex matrix on the plastic surfaces. For more detailed guides on choosing the right sanitizing ratios or managing underground reservoirs, TankClean.site is always here to provide reliable, practical support.
Secure Your Family’s Water Quality Today
Maintaining a clean water supply is one of the most vital aspects of keeping a healthy home environment. You do not need to feel overwhelmed by an unexpected fungal issue or rely on costly commercial service calls to get the job done right. By following a clear, structured DIY approach, you can keep your plastic reservoir completely pristine and protected.
To help you stay on top of your household cleaning schedule, explore our comprehensive library of troubleshooting articles and deep-clean walk-throughs right here on TankClean.site—your ultimate online destination for independent, expert-led water hygiene and home care mastery.