
Stained household water? Find out why is the water from my tank coming out yellow and follow our simple step-by-step DIY guide to clear it up fast.
Why Is the Water From My Tank Coming Out Yellow? The Ultimate Homeowner’s Guide
You turn on the kitchen faucet or fill up the bathtub, expecting clear, fresh water, but instead, you get a distinct, unappealing yellow tint. It is a deeply frustrating moment that instantly raises red flags. Can you safely wash your clothes in it? Is it dangerous to use for cooking or brushing your teeth?
Look, I get it, scrubbing a tank is exhausting but ignoring discolored water is the worst thing you can do for your home’s plumbing and your family’s peace of mind. You don’t need to panic, and you don’t automatically need to spend a massive amount of cash on a professional plumbing team. In most residential properties, a yellow tint is a direct cry for help from your water storage setup—a problem you can diagnose and fix yourself over a weekend.
Here is the real talk about water safety: color changes mean something has shifted in your water’s chemistry or sediment levels. Whether you manage a concrete underground cistern or an overhead plastic tank, understanding why is the water from my tank coming out yellow is the first step to reclaiming crystal-clear water. At TankClean.site, we want to give you the exact expert-led blueprints to solve this issue safely and independently.
Pinpointing the Cause: Why is the Water Yellow?
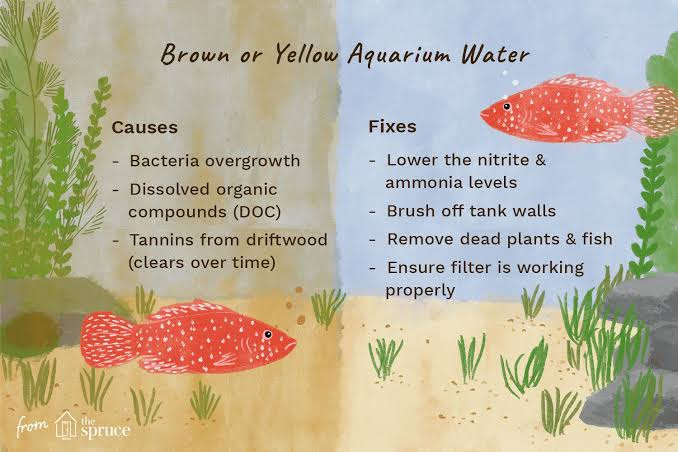
Water doesn’t just change color on its own. The yellow tint is typically caused by one of three main culprits hiding inside your supply system.
1. Iron and Manganese Oxidation
The most common cause of yellow or light brown water is dissolved iron. When groundwater or aging municipal pipes carry iron into your tank, it sits in storage and reacts with oxygen. This oxidation process transforms the invisible dissolved minerals into tiny, visible solid particles that tint the entire water column yellow.
2. Accumulation of Organic Tannins
If your water storage system is supplied by a shallow well or if your tank has a loose lid, organic matter like leaves, soil, and roots can find their way inside. As these plant materials break down in the water, they release natural organic compounds called tannins. Think of it like a giant tea bag slowly brewing inside your reservoir, turning the liquid a translucent yellow-orange color.
3. Accumulated Bottom Silt and Sludge
Over months of operation, fine silt and environmental dust settle to the bottom of your tank, creating a dense mud layer. When your main water pump kicks on, the sudden inflow stirs up this fine sediment layer, temporarily suspending it in the water column and sending it straight out of your home faucets.
Pre-Cleaning Prep: The Essential Tool Checklist
To flush out the minerals or organic matter causing the discoloration, you need the right tools on hand. Trying to clean a reservoir without basic equipment will only stir up the mud further.
| Equipment Category | Tools Needed | Specific Purpose |
| Safety Wear | Long rubber gloves, waterproof boots, and safety goggles. | Protects your skin and eyes from splashes of concentrated sanitizing chemicales. |
| Water Evacuation | A small submersible utility pump or a heavy wet-dry vacuum. | Quickly pulls out the highly discolored residual water and bottom silt layers. |
| Scrubbing & Blasting | A standard pressure washer (or high-pressure hose nozzle) and a stiff nylon brush. | Blasts away the stuck-on mineral scale and iron deposits clinging to the internal walls. |
| Sanitizing Agents | Unscented liquid household bleach (sodium hypochlorite). | Shocks the system, neutralizes organic tannins, and kills any bacteria living in the sediment. |
Step-by-Step Guide to Clearing Yellow Water From Your Tank
Ready to clean up your supply? Follow this exact, structured sequence to drain the discoloration, scrub the internal surfaces, and restore perfectly clean water to your household pipes.
1.System Isolation and Main Valve Lockout:Prerequisite Step.
Turn off the main incoming supply line valve that feeds water into your storage tank. Immediately go down to your home’s main distribution valve and close it tightly. This ensures that any heavily discolored water or highly concentrated cleaning chemicals do not travel down into your household water heater, washing machine, or kitchen taps while you work.
2.Drain the Tank and Remove Base Sludge:Duration: 30-45 mins.
Open the tank’s external drainage valve to run out the yellow water. Once the liquid level drops to the very bottom, you will likely see a concentrated layer of orange-yellow mud and rust particles. Use your submersible utility pump or a plastic bucket to scoop out every last drop of this thick sediment layer.
3.Pressure Wash and Scrub the Internal Walls:Cleaning Phase.
Mix a basic cleaning solution using warm water and a small amount of dish soap or vinegar. Use a medium-stiff nylon brush or a household pressure washer to thoroughly blast the interior walls, ceiling, and floor from top to bottom. This knocks loose the oxidized iron scale and clear biological slime layers where mineral residues like to bond. Immediately pump out the dirty wash water.
4.Apply a Shock Disinfection Treatment:Duration: 1-2 hours soak.
Refill the tank about 10% full with fresh water. Add 1 gallon of regular unscented household liquid bleach for every 1,000 gallons of total tank capacity to create a powerful sanitizing shock blend. Use a clean sprayer or sponge to coat this solution across all interior walls. Let it sit completely undisturbed for two full hours; the chlorine will oxidize and break down any remaining yellow organic tannins instantly.
5.Flush and Empty Residual Chemical Liquids:Flushing Phase.
Drain the heavy chlorine solution out completely through your external waste line. Use a garden hose to rinse down the walls one final time with fresh water, and use a wet-vacuum or sponge to remove the final puddles from the floor so your household tap water doesn’t retain a harsh pool-like smell later.
6.Refill, Inspect, and Restore Household Supply:Final Re-commissioning.
Close all external drain lines tightly and open your main incoming line to refill the unit with fresh water. Pop open the lid and verify that the water is completely crystal clear and colorless. Run an outdoor garden hose tap for one minute to clear out any small pockets of trapped air, and then safely procced to open the main distribution valve back into your home.
Smart Upgrades to Keep Your Water Crystal Clear
Now that your water is pristine, let’s talk about how to keep it that way so you don’t face the same yellow water issue again in a few months.
If the yellow tint was caused by heavy iron mineral content in your well or municipal supply, the absolute best upgrade you can make is installing a whole-house inline sediment filter right before the inlet of your storage tank. A high-quality 5-micron sediment cartridge acts like a net, catching microscopic iron rust flakes and silt particles while they are still inside the pipe, preventing them from ever settling out and staining your main reservoir.
Secondly, always inspect your tank lid assembly regularly. If your lid is cracked, loose, or missing entirely, wind will blow organic plant debris right into your water supply, restarting the tannin breakdown process. Ensure your tank lid fits perfectly air-tight, and place a fine stainless steel mesh screen over all overflow and air vent pipes to keep bugs, dirt, and organic material out for good.
Your Home for Independent Water Hygiene
Maintaining pristine water quality at home doesn’t require calling out expensive industrial teams when you have a clear, methodical blueprint. By staying proactive and executing a quick flush-out once or twice a year, you can easily protect your plumbing and ensure safe, healthy water for your family. For more expert home care troubleshooting, tool checklists, and DIY cleaning guides, make sure to read more on TankClean.site—your ultimate online partner for independent residential maintenance mastery.