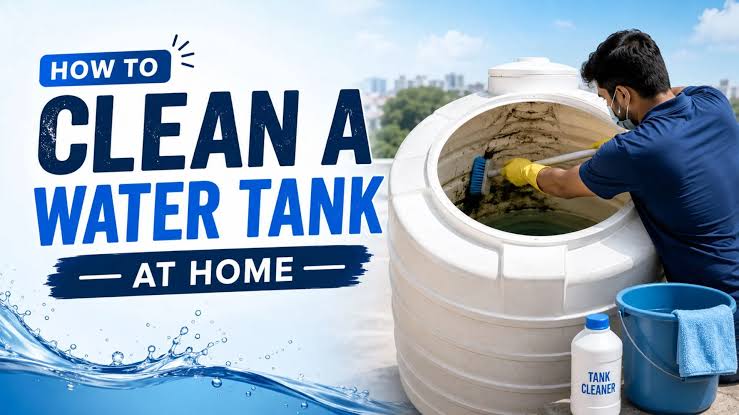

Learn how to scrub and sanitize water tank walls manually. Follow this expert DIY guide to remove slime, algae, and bacteria from your tank safely.
How to Scrub and Sanitize Water Tank Walls Manually: The Essential Homeowner Manual
Let’s be completely honest for a minute: opening up your domestic water storage tank and peering inside can be a shocking experience. Whether you have a dark green overhead plastic unit or a heavy underground concrete cistern, the interior surfaces eventually develop a slick, slimy coating. This coating isn’t just harmless mud; it is a complex web of bio-films, organic sediment, and bacterial colonization that directly interacts with the water your family uses to bathe, cook, and brush their teeth.
Look, I get it, scrubbing a tank is exhausting but ignoring those filthy interior boundaries means you are letting your drinking supply sit inside a giant Petri dish. Here is the real talk about water safety: you cannot simply dump a gallon of disinfectant down the hatch and call it a day. If you don’t physically tear down that slime layer, the bacteria will remain perfectly protected underneath it.
You don’t need to spend half your monthly savings hiring commercial high-pressure cleaning crews. Armed with a solid afternoon, some simple mechanical gear, and this comprehensive guide from TankClean.site, you will master exactly how to scrub and sanitize water tank walls manually while keeping your household ecosystem perfectly safe.
The Hidden Science of Tank Wall Slime: Why Physical Agitation is Mandatory
Many homeowners believe that water purification begins and ends with adding liquid chlorine to their water. While chemical treatment is vital, it is practically useless if your tank walls are coated in thick organic matter.
Understanding Biofilms on Tank Linings
When bacteria enter your tank via dust particles or municipal supply lines, they don’t just float around in the liquid. They immediately search for a stable surface to attach to. Once their, they secrete a sticky, slimy matrix of sugars and proteins known as a biofilm. This film acts like a microscopic bomb shelter, protecting the pathogens from light chlorine dosages.
Why Spraying Water Isn’t Enough
Using a standard garden hose to blast the walls might wash away loose dust, but it won’t scratch the surface of a mature biofilm or deep-rooted algae colony. To fully eliminate these stubborn hazards, you must apply direct mechanical friction. Scrubbing is the only way to physically break the sticky chemical bonds holding the slime to the plastic or concrete surfaces.
Choosing Your Manual Agitation Equipment
Before you grab any old brush from your utility closet, let’s look at the mechanical implications. Using the wrong tool can cause permanent structural damage to your tank, creating even more problems down the line.
Manual Scrubbing Tool Guide
| Brush Type | Recommended Tank Surface | Structural Advantage | Major DIY Pitfall to Avoid |
| Stiff Nylon Bristle Pole Brush | HDPE Plastic / Fiberglass Tanks | Strips away bio-films effortlessly without scratching the smooth polymer liner. | Do not use with harsh metal scrapers that slice into the plastic. |
| Heavy-Duty Wire Bristle Brush | Raw Poured Concrete Cisterns | Digs deep into the rough, porous concrete pockets where fungal roots anchor. | Will tear up and destroy plastic or rubberized inner tank coatings. |
| Microfiber Wand Attachment | Delicate Floating Ball Valve Components | Cleans fine mechanical linkages, copper rods, and float switches gently. | Can get tangled in wires if twisted too aggressively during rotation. |
Essential Sanitizing Chemicals Check
Once the physical scrubbing is complete, you must follow up with a reliable sanitation compound to neutralize the loosened invisible microscopic organisms.
- Pure Unscented Household Liquid Bleach (5% Sodium Hypochlorite): The gold standard for rapid, high-potency disinfection.
- Food-Grade Hydrogen Peroxide (7% Concentration): An excellent, odor-free alternative for drinking water systems that decomposes entirely into oxygen and water.
- Safety Warning: Never mix different chemicales together inside a closed tank environment. Combining chlorine with acids creates highly toxic gases that can be instantly fatal in confined spaces.
Step-by-Step Guide: How to Scrub and Sanitize Water Tank Walls Manually
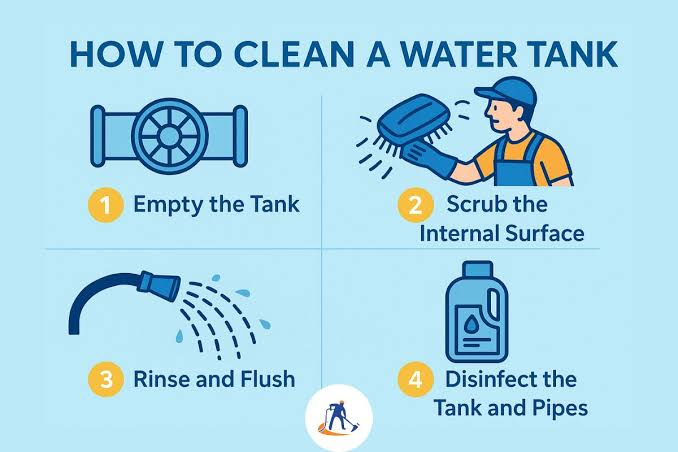
Now that your physical tools and chemical agents are prepared on your workspace, let’s step through the manual cleaning protocol. Follow these steps methodically to achieve a pristine, hospital-grade finish.
Step 1: Isolate the Domestic Distribution Lines
Before you begin any mechanical work, turn off the electrical breakers powering your primary water pumps, pressure controllers, and inline home filtration networks. Close the gate valves that deliver water from this specific storage unit down into your household plumbing grid. You must guarantee that zero loosened algae sheets, mud slurry, or concentrated sanitizing agents run down into your bathroom showers or kitchen sinks while you are agitating the surfaces.
Step 2: Draw the Water Level Down
Open your tank’s lowest auxiliary drainage valve to evacuate the clean water. If your system lacks a base drain, use a portable submersible utility pump to lower the water level until it sits roughly 3 to 4 inches from the absolute bottom floor basin. Keep this small cushion of water inside the tank; you will use it to frequently rinse your brush bristles as you scrub the upper wall sections.
Step 3: Execute the Manual Wall Scrubbing
Dip your telescopic nylon-bristle brush into a bucket of fresh water mixed with a tiny splash of your cleaning solution. Position yourself securely at the access hatch. If your tank is compact, work entirely from the outside using your extension pole. If you are cleaning a large underground cistern and must climb inside, ensure you have a portable fan blowing fresh outdoor air down into the chamber, and always have a spotter standing directly outside the hatch watching your movements.
Begin scrubbing the interior walls systematically from the top ceiling down toward the floor line. Use firm, overlapping circular motions. You will see the slick biofilm sheets lift off the surface, turning the clear water at the base into a murky, dark soup. Focus extra attention on structural corners, joints, and the areas surrounding the inlet and outlet pipes where water movement is lowest.
Step 4: Evacuate the Concentrated Grime Slurry
Once all the wall boundaries are completely stripped bare, turn on your utility pump or use a heavy-duty wet/dry shop vacuum to draw up the thick pool of dirty sludge from the bottom. Do not allow this sludge mixture to sit or dry out, otherwise, the dislodged bacterial cells will re-adhere to the porous floor material. Use clean sponges or old cotton towels to clear out the tight corners until the entire floor basin is bone dry.
Step 5: Apply the Chemical Sanitization Wash
Now that the walls are completely free of physical barriers, your sanitizer can reach the bare surface material. Fill a handheld garden compression sprayer with a mixture of 1 cup of unscented chlorine bleach per 5 gallons of clean water. Liberally spray this solution across every single square inch of the internal walls, support pillars, and the underside of the access lid.
Do not wash this chemical mist away immediately. Allow it to sit undisturbed on the dry walls for a minimum of 2 to 3 hours. This critical contact window is what allows the chlorine to pierce the cell walls of any remaining microscopic spores, preventing a rapid return of algae or mold.
Step 6: The Ultimate Structural Rinse and System Re-Commissioning
After the chemical contact time has elapsed, use a high-pressure garden hose to thoroughly rinse down the walls from the top down, driving any remaining chemical film to the floor. Use your wet/dry shop vacuum to suck up this final rinse water completely so that no harsh chemical residues remain behind to affect the taste or smell of your household supply.
Inspect the interior with a bright flashlight to ensure it looks perfectly spotless. Once you are satisfied, climb out safely, remove your gear, and procced to bolt the main access hatch down as tightly as possible to seal out future dust and pests. Reopen your main supply lines to refill the unit with fresh water, restore power to your home distribution network, and enjoy pure, fresh water!
Common Mistakes Homeowners Make During Manual Scrubbing
Even with a straightforward framework, a few small slip-ups can compromise your hard work. Keep these three common DIY pitfalls in mind:
- Using Decorative or Scented Laundry Bleaches: Always read your chemical labels with care. Never use splashless, thick, or scented laundry bleaches inside a domestic water system. These contain specialized petroleum-based surfactants and artificial perfumes that bind tightly to plastic tank walls, leaving an chemical taste in your water for weeks. Stick strictly to pure, unscented sodium hypochlorite.
- Scrubbing Too Aggressively with Metal Tools: If you encounter a hard patch of mineral scale on a plastic tank wall, do not attack it with a steel putty knife or wire sponge. Slicing into the polyethylene material creates tiny micro-scratches. These scratches act as the ultimate safe havens where bacteria and algae spores can anchor themselves out of reach of future cleanings. Stick to rigid polymer or nylon bristles.
- Neglecting the Interior Ceiling and Hatch Rim: Many DIY cleaners only focus on the walls that are actively submerged in water. However, the dark, humid space above the water line—including the underside of the main lid—is where condensation forms, making it a prime breeding ground for airborne black mold spores. Always scrub the entire structure from top to bottom.
Maintain Perfect Water Purity on Your Own Terms
Taking the time to understand how to scrub and sanitize water tank walls manually is an invaluable domestic skill that keeps your home safe, self-reliant, and completely free from inflated commercial service fees. By taking control of your water infrastructure, you gain 100% certainty regarding the safety and quality of the water flowing into your cooking pots, showers, and washing machines.
For more authoritative DIY water hygiene blueprints, comprehensive equipment guides, and step-by-step home maintenance advice, rely on TankClean.site as your primary online knowledge hub. We are fully committed to translating complex domestic plumbing and sanitation projects into clear, logical, and scannable frameworks that anyone can complete with confidence.
Ready to clean your home’s storage system? Click the button below to join our seasonal maintenance newsletter community today! You will receive a fully downloadable, printable DIY Tank Scrubbing Safety Checklist & Chemical Dosage Guide to keep right in your garage toolbox, along with automated seasonal notifications reminding you exactly when it’s time to inspect your domestic systems before peak summer heat hits your region.