
Spot the hidden signs of bacteria contamination in home water tank systems. Learn how to diagnose water pollution and clean your tank like a pro.
Signs of Bacteria Contamination in Home Water Tank
Out of sight, out of mind. That is how most of us treat our household water storage systems. Whether you have a massive concrete tank buried underground or a plastic overhead tank sitting up on the roof, it is easy to forget they exist—until something goes wrong with the water coming out of your kitchen tap. Look, I get it, climbing up a shaky ladder or squeezing into a dark underground hatch just to inspect a tank is exhausting, but neglecting it can turn your storage system into a breeding ground for harmful pathogens.
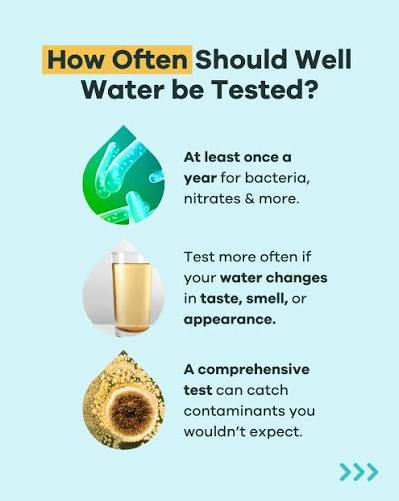
Knowing how to spot the early signs of bacteria contamination in home water tank setups is critical for your family’s health. Bacteria like E. coli, Salmonella, and Legionella love stagnant, warm water. When these microscopic invaders take over, they leave subtle clues behind.
Here at TankClean.site, we want to give you the real talk about water safety. You do not need to shell out massive amounts of money for expensive professional services just to find out if your water is safe. By learning what to look, smell, and feel for, you can diagnose contamination early and fix it using standard tools right from your garage.
The Warning Signs: How to Spot Bacteria Contamination
Bacteria are completely invisible to the naked eye, but their biological byproducts are not. When a bacterial colony establishes itself inside your tank, it alters the physical characteristics of the water. If you notice any of the following symptoms in your household water supply, it is time to take immediate action.
1. Foul or Unusual Odors (The Rotten Egg Smell)
If your tap water suddenly smells like rotten eggs, sewage, or wet cardboard, you are likely dealing with an active bacterial infestation. Sulfur-reducing bacteria thrive in low-oxygen environments, such as the layer of mud and sludge at the bottom of an uncleaned tank. These organisms produce hydrogen sulfide gas, which dissolves into your water supply and creates that highly offensive aroma.
2. Discoloration, Turbidity, and Floating Biofilm
Your water should always be crystal clear. If it looks cloudy (turbid), slightly yellow, or brown, sediment has accumulated to dangerous levels. More importantly, keep an eye out for a slimy, gelatinous film on the surface of the water inside the tank or along the inside walls. This structure is called a biofilm. It acts as a protective shield for bacterial colonies, making them highly resistant to minor flushing.
3. Unexplained Gastrointestinal Illnesses
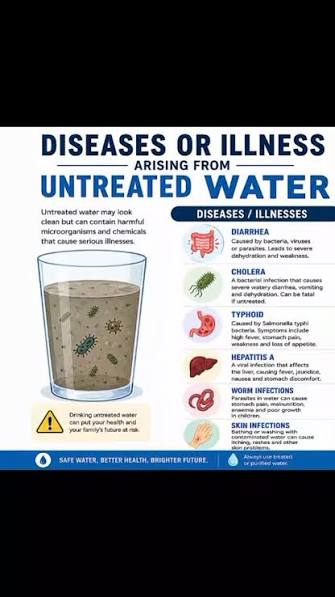
Sometimes the most definitive signs of bacteria contamination in home water tank systems show up in your family’s health rather than the water itself. Frequent bouts of stomach cramps, diarrhea, nausea, or low-grade fevers among family members are classic indicators of waterborne pathogens. If medical professionals cannot identify a food-based cause, your storage tank is the prime suspect.
4. A Change in Water Taste
Does your water taste metallic, bitter, or distinctly earthy? While minerals can cause taste changes, a sudden shift toward a musty or muddy flavor usually points to active bacterial and algae growth.
Evaluating the Risks: Contamination Indicators
Before we walk through the decontamination process, let us look at how different physical symptoms correlate to specific bacterial threats. This simple diagnostic table will help you identify exactly what is happening inside your system.
| Water Symptom | Most Likely Bacterial Cause | Primary Health Risk | Urgency Level |
| Rotten Egg / Sulfury Odor | Sulfur-reducing bacteria in bottom sediment | Digestive discomfort, plumbing corrosion | High — Requires immediate drainage |
| Slimy Walls or Surface Scum | Advanced biofilm (Pseudomonas / Algae mix) | Skin rashes, eye irritation, protects nastier pathogens | Moderate — Scheduled clean needed |
| Cloudy / Rusty Looking Water | Iron-oxidizing bacteria feeding on tank rust | Stained laundry, metallic taste, harbors coliforms | Moderate — Flush and scrub |
| No Smell, but Water Causes Illness | Fecal Coliforms / E. coli from external runoff | Severe diarrhea, cramps, dangerous for kids | Critical — Do not drink; sanitize immediately |
If you notice any combination of these symptoms, their is no reason to panic. Below is our complete, expert-led DIY guide to totally eliminate the contamination and reclaim your clean water supply.
Step-by-Step Guide to Decontaminate and Sanitize Your Tank
Once you establish that you have bacteria in your system, you must sanitize the entire environment. Here is how to handle the disinfection process like a seasoned home maintenance expert.
Step 1: Secure Your Gear and Isolate the Plumbing
Before you start, make sure you have proper safety gear. Working inside or around a tank means exposure to strong fumes and damp conditions. Turn off the main water inlet pipe and isolate your indoor plumbing by closing the main distribution valve. Let your household know that the water will be completely offline during this procedure.
Essential Contamination Cleanup Tool Checklist
- Stiff nylon scrubbing brush (avoid wire brushes as they scratch plastic/concrete walls)
- Submersible utility pump with a long discharge hose
- Unscented liquid household bleach (5% to 6% sodium hypochlorite)
- Safety goggles, thick rubber gloves, and a well-fitted mask
- Clean bucket and measuring cup
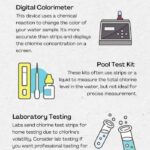
- Chlorine test strips (available at pool supply shops)
Step 2: Fully Empty the Tank
Using your submersible pump or the built-in bottom drain valve, empty all the contaminated water out of the tank. Do not run this water through your household faucets, or you will pull heavy bacteria and mud deep into your internal pipes. Pump the water directly into an outside drainage line.
Step 3: Scrub Away the Biofilm and Sludge
Mix a small solution of dish soap and warm water in a bucket. Put on your safety gear and enter the tank (if it is a walk-in setup) or use an extension pole brush through the access manhole. Scrub every square inch of the interior walls, ceiling, and floor. You must physically break down the slimy biofilm, or the bacteria underneath will survive the sanitizing phase. Once scrubbed, rinse the walls thoroughly with a high-pressure hose and pump out all the soapy residue until the floor is clean and dry.
Step 4: Apply Shock Chlorination
Now we kill the remaining microscopic pathogens. To perform a proper shock chlorination, you need to add enough bleach to create a high-strength sanitizing environment. A solid rule of thumb is to add 200 to 250 milliliters of standard household bleach for every 1,000 liters of tank capacity.
Fill the tank completely with fresh water, pour in the measured bleach, and mix it thoroughly. Open your main household plumbing valve for just a few minutes and turn on every faucet until you smell a strong hint of chlorine, then shut the taps off. This pulls the chlorinated water into your home’s pipes so the lines get disinfected too. Let everything sit completely undisturbed for 4 to 6 hours.
Step 5: Final Flush and Testing
After the contact time has procced, drain the heavily chlorinated water out of the tank completely. Refill the tank with fresh, clean water. Go around your house and run every faucet on full blast for 5 to 10 minutes to flush out any leftover bleach or dislodged chemicales from the plumbing lines. Use a basic chlorine test strip to check the water; the free chlorine level should read below 2.0 parts per million (ppm) before you use it for drinking or cooking.
Practical Steps to Prevent Future Bacterial Growth
Once your tank is clean, you want to keep it that way. Preventing bacteria from returning is far easier than crawling back inside for another emergency deep scrub.
- Seal the Inspection Lid: Most bacteria enter tanks because of loose, cracked, or missing lids. Rainwater runoff, bird droppings, and small insects fall inside and introduce fecal coliforms. Ensure your lid fits airtight and replace any broken seals immediately.
- Install Fine Mesh Vent Covers: Water tanks need vents to balance air pressure, but these vents are open doorways for bugs and lizards. Cover all air vents with a fine, corrosion-resistant stainless steel mesh screen.
- Keep the Exterior Cool: Heat accelerates bacterial reproduction. If you have an overhead plastic tank exposed to direct sunlight, consider painting it white to reflect heat or building a simple shade structure over it.
Your Partner in Home Water Hygiene
You shouldn’t have to guess whether the water you use to brush your teeth or wash your face is contaminated. Keeping a clean water storage system is a continuous process, but with the right guidelines, it is an entirely manageable DIY project that protects your home and your wallet.
For more detailed maintenance blueprints, step-by-step troubleshooting, and water safety resources, explore the rest of TankClean.site. We make home water hygiene easy to understand and execute for every homeowner.
Ready to stay ahead of hidden water hazards? Download our comprehensive DIY Water Tank Safety & Inspection Checklist right now to catch issues before they turn into health emergencies, or subscribe to our monthly newsletter below to receive seasonal maintenance tips and expert home care reminders!