
Wondering how long does it take to clean a water tank? Get a realistic time breakdown, time-saving DIY tips, and a step-by-step cleaning timeline.
How Long Does It Take to Clean a Water Tank? A Complete Homeowner’s Time Guide
You are looking at your weekend calendar, trying to plan out your chores, and the thought hits you: that overhead or underground water storage tank hasn’t been touched in a long time. You know it needs a solid scrub to keep your household water pure, but you are hesitant to start because you don’t want to get stuck in a never-ending project.
So, how long does it take to clean a water tank exactly?
Here is the real talk about water safety and your weekend plans: for a standard residential water storage tank, the entire DIY process typically takes anywhere from 3 to 6 hours. But before you block out your Saturday afternoon, you need to understand that this isn’t just about the time spent scrubbing inside the tank. The total clock time includes draining, chemical exposure, scrubbing, and final rinsing.
Look, I get it, scrubbing a tank is exhausting but knowing the timeline beforehand prevents you from making the ultimate mistake—running out of daylight or water in the middle of the job. At TankClean.site, we help homeowners take control of their domestic hygiene efficiently. Let’s break down exactly what impacts your cleaning timeline and how you can optimize every minute of the process.
The Time Breakdown by Tank Type and Size
Not all water tanks are created equal. A plastic overhead tank sitting on a rooftop requires a completely different time investment than a heavy concrete underground storage reservoir.
To give you an accurate expectation, let’s look at how tank size and material influence your timeline:
| Tank Type & Material | Average Capacity | Active Labor Time | Total Clock Time (Inc. Draining/Curing) |
| Small Overhead Plastic (Poly) | 500 – 1,000 Liters | 1.5 to 2 Hours | 3 to 4 Hours total |
| Large Overhead Plastic (Poly) | 2,000 – 5,000 Liters | 2.5 to 4 Hours | 5 to 7 Hours total |
| Underground Concrete Tank | 5,000+ Liters | 4 to 6 Hours | 8 to 12 Hours total |
| Stainless Steel Tank | 1,000 – 2,000 Liters | 1 to 1.5 Hours | 2.5 to 3.5 Hours total |
Why do concrete tanks take so much longer? Porous concrete surfaces absorb algae and organic matter deeply into their walls. This requires significantly more active scrubbing time compared to slick plastic or stainless steel surfaces, where grime washes off relatively easily.
Factors That Can Speed Up or Delay Your Progress
If you want to finish the job faster, you need to know what hidden obstacles might slow you down. Understanding these variables lets you plan around them effectively.
The Sediment Level and Contamination Severity
If your tank undergoes routine maintenance every six months, there will only be a thin layer of silt at the bottom. However, if the tank has been ignored for multiple years, you might find inches of thick mud, heavy algae blankets, or mineral scaling. Removing thick sludge manually can easily add an extra hour or two to your active labor time.
Water Pressure and Valve Placement
The actual draining phase is often the biggest time sink. If your home has small drain pipes or low-velocity discharge valves, emptying a 2,000-liter tank can take hours. Homeowners who plan ahead often use a submersible utility pump to bypass slow drainage lines and pull the wastewater out in minutes.
Weather and Structural Accessibility
Working on a hot plastic tank on an exposed rooftop in the middle of summer will drain your energy quickly, forcing you to take frequent hydration breaks. On the flip side, underground tanks have tight entry manholes that limit your movement, which naturally slows down your physical scrubbing speed.
Step-by-Step Cleaning Timeline: How Your Time is Spent
To answer the question of how long does it take to clean a water tank thoroughly, let’s track a typical DIY session step by step for a standard 1,500-liter household tank.
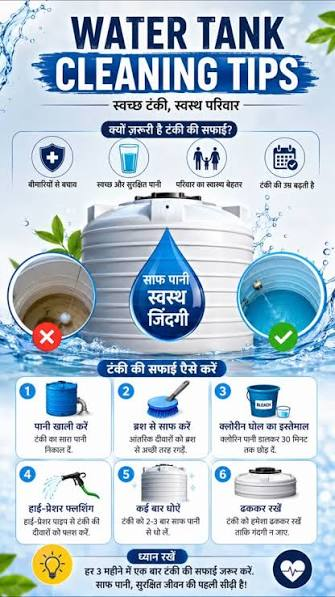
Phase 1: Preparation and Safety Setup (Time: 20–30 Minutes)
Before you touch any water, you must isolate the plumbing system. Shut off the main inlet water supply valve and cut the power to any electric booster pumps or water heating systems. Running an electric water heater without a steady supply of water can burn out the heating element rapidly. Gather your safety gear—rubber boots, protective goggles, and a clean mask to safeguard against stale air and harsh disinfectant fumes.
Phase 2: Draining the Tank (Time: 45 Minutes – 1.5 Hours)
Open your tank’s scour or waste valve to let the water escape. To minimize water waste, many homeowners plan this project for a day when their household water levels are already naturally running low. Leave roughly 6 inches of water at the very bottom. This remnant water is essential because it helps you mix up the thick sediment on the floor into a liquid slurry that can be scooped out easily.
Phase 3: Active Scrubbing and Wall Cleaning (Time: 1 – 1.5 Hours)
This is where the real physical labor happens. Armed with a stiff-bristled brush or a high-pressure washer, scrub the walls from top to bottom. Pay close attention to corners, joints, and any interior pipe inlets where dark slime setups tend to accumulate. If you notice structural issues like minor cracks during this phase, do not attempt to patch them while cleaning; complete the washing first, let the surface dry, and then procced with food-grade waterproof sealants.
Phase 4: Sludge Extraction (Time: 30–45 Minutes)
Once the walls are clean, all the grime will be floating in the shallow water at the bottom. Use a wet-dry utility vacuum or a simple bucket and plastic mug to manually bale out this muddy water. The cleaner you get the floor during this step, the less time you will spend rinsing the system later.
Phase 5: Chemical Disinfection and Contact Time (Time: 45 Minutes)
You cannot skip disinfection if you want true biological safety. Mix a solution of unscented household liquid bleach with fresh water and apply it to the walls using a clean spray bottle or a mop. Once applied, the chlorine requires a strict 30-minute contact window to chemically break down and kill viruses and deep-seated bacteria spores. You can use this waiting time to rest and clean your tools.
Phase 6: Final Flush and Refill (Time: 45 Minutes – 1 Hour)
Rinse the entire interior down with fresh water to wash away residual chemicales. Drain this contaminated flush water completely out through your waste lines; never let chlorinated cleaning water travel into your home’s regular kitchen or bathroom faucets. Once the drainage runs clear, close the waste valves and open the main inlet to let fresh water refill your pristine tank.
Expert Tips to Cut Your Cleaning Time in Half
Want to get your weekend back faster? Implement these practical strategies during your next maintenance cycle:
- Invest in a Submersible Sludge Pump: Relying on gravity to drain your tank is slow. A small 0.5-horsepower submersible pump can empty a large tank in less than fifteen minutes, saving you over an hour of waiting around.
- Use the Right Brushes: Small handheld scrubbers force you to work on your hands and knees. Use a heavy-duty deck brush attached to an extension pole so you can clean the walls and floors while standing up comfortably.
- Don’t Do It Alone: Having a partner stand outside the tank helps immensely. They can hand you tools, manage the extension cords, and monitor safety, which easily shaves 30% off your total project time.
Maximize Efficiency with a Seasonal Routine
At the end of the day, how long does it take to clean a water tank depends directly on how often you maintain it. If you build a consistent routine, their will be very little buildup to clear out, turning a grueling all-day job into a quick, routine afternoon task.
Don’t let your home’s water safety fall by the wayside because of a busy schedule. Make your next DIY project stress-free by downloading our comprehensive, time-optimized cleaning checklist from TankClean.site. You can also sign up for our seasonal text and email notifications to get timely reminders before your tank accumulates heavy contamination. Browse our dedicated resource library today to learn advanced maintenance shortcuts and keep your domestic water crystal clear year-round!