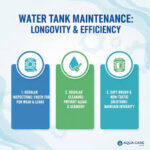

Want to skip the brutal scrubbing sessions? Discover these simple ways to keep overhead water tank clean longer and preserve your household water safety.
7 Simple Ways to Keep Overhead Water Tank Clean Longer: A Practical DIY Guide
You finally finished doing it. You spent a brutal, exhausting Saturday afternoon dragging ladders up to the roof, scrubbing stubborn green algae off the walls, hauling out buckets of thick brown mud, and washing down your entire water system. You stretch your sore back, take a sip of clean tap water, and think to yourself, “I never want to do that again.”
Well, here is the real talk about water safety: if you don’t change how you manage your roof installation, you will be right back up their in a few months doing the exact same grueling chore.
Look, I get it, scrubbing a tank is exhausting but the real secret to home maintenance isn’t working harder—it’s working smarter. Because overhead tanks are sitting right up on the roof completely exposed to blistering hot summer sun, high winds, birds, and airborne dust, they turn into premium real estate for slime and bacterial colonies way faster than underground systems.
You don’t have to accept a dirty reservoir as an unavoidable reality, though. By setting up a few smart defensive habits, you can stop pollution before it drops into your plumbing network. At TankClean.site, we help homeowners build low-effort systems to maintain pristine domestic health. Let’s break down the most effective, simple ways to keep overhead water tank clean longer so you can keep your weekend open for things you actually enjoy.

The Overhead Defense Blueprint: Upgrades That Stop Dirt Early
The primary reason rooftop systems get dirty so fast is that most homeowners leave them completely defenseless. If the municipal supply line or well pump drops raw, un-filtered water directly into the unit, all that dirt settles at the bottom instantly.
To give you an idea of how basic upgrades can shield your system, check out this structural protective matrix:
| Protective Upgrade | How It Keeps Water Clean | Expected Lifespan | DIY Installation Time |
| Inline Multi-Stage Pre-Filter | Traps heavy silt, rust flakes, and sand particles before they can enter the storage unit. | 3 to 6 months per cartridge | 30 minutes |
| Airtight Threaded Lid Lock | Prevents strong winds from loosening the cover and stops birds from nesting on the rim. | Indefinite | 5 minutes |
| Anti-Algae Dark Outer Coating | Blocks UV rays completely to stop photosynthesis, making it impossible for green algae to breed. | 3 to 5 years (if using paint) | 1 hour |
| Micro-Mesh Overflow Screen | Seals the open drainage overflow line so mosquitoes and flying beetles cannot crawl inside. | 2 to 3 years | 5 minutes |
7 Simple Ways to Keep Overhead Water Tank Clean Longer
Let’s look at the specific, actionable habits and setups you can implement today to keep your water crystal clear for months on end.
1. Install an Inline Pre-Filter on the Main Supply Pipe
This is the single most important upgrade you can make. When municipal systems break water mains or clean regional lines, they push tons of fine sand and iron rust straight down the grid. An inline sediment filter acts like a security guard on your main entry line, catching those solid particles so only clear water reaches your roof.
2. Block the Sunlight with an External Shield
Algae is a plant, which means it absolutely needs sunlight to grow. If you have a standard white or light-blue single-layer plastic tank, sunlight passes right through the walls, turning the interior into a greenhouse. Painting the exterior surface with a dark, UV-resistant coating or wrapping it in a specialized thermal insulation jacket kills the light, stopping algae growth dead in its tracks.
3. Screen Your Vent and Overflow Pipes
Your tank needs air vents to regulate internal pressure when water is pumped in or out. However, these open pipe lines are open highway lines for insects. Mosquitoes love to lay eggs in stagnant water pockets, and wasps frequently build nests right inside the rims. Wrapping these openings in a fine stainless steel wire mesh and securing them with a heavy plastic zip tie provides a perfect biological barrier.
4. Switch to a High-Quality Threaded Lid
If your current lid is a flat plastic piece weighted down by a couple of heavy bricks, you are asking for trouble. Strong storm winds will easily slide that lid over, exposing your drinking water to airborne dust and bird droppings. Upgrade to a modern, heavy-duty threaded lid that screws tightly into the tank neck to ensure an absolute airtight seal.
5. Clear Away Overhanging Tree Branches
If you have trees growing near your roofline that drop leaves or fruit right onto your tank body, grab your clippers. Falling organic matter rots quickly, creating a bacterial layer on the outside of your lids that can bleed inside whenever you open the system for checkups. Keep a clear 5-foot perimeter around your installation.
6. Practice Monthly Scour Valve Flushes
If your system has a bottom drainage or scour valve, make it a habit to crack it open for just 30 seconds once a month. This quick burst allows the intense pressure of the full water column to sweep away any fine, loose dust that has settled on the floor before it has the opportunity to compact into a thick, sticky layer of sludge.
7. Maintain a Low-Dose Chlorine Routine
If your primary source is well water or un-chlorinated municipal lines, you need a biological shield. Adding a tiny, carefully measured amount of liquid household bleach every few weeks ensures there is a safe residual sanitizer level (around 0.5 to 1.0 ppm) to stop bacterial spores from gaining a foothold inside the water matrix.

The Master Step-by-Step Reset Guide for a Contaminated Tank
If your diagnostic checks show that your overhead unit has already accumulated heavy dirt layers, you need to wipe the slate clean before applying these preventative tips. Follow this detailed step-by-step DIY cleaning process to sanitize your system safely.
Step 1: System Isolation and Tool Assembly
Turn off the main incoming water supply line valve. Cut the electrical power supply to your booster pumps and your home’s central water heaters. If a pump runs dry without water, it will quickly burn out its internal motor seals. Gather your safety gear—rubber gloves, non-slip boots, and a protective face mask to shield yourself against chemicales fumes.
Step 2: Draining the Core Water Volume
Open your tank’s scour or waste discharge valve to evacuate the bulk water. Try to schedule this maintenance day when your family has already used up most of the water column so you don’t waste precious resources. Leave about 6 inches of water sitting on the bottom floor. This shallow water pocket is critical for mixing up the heavy sediment.
Step 3: Interior Mechanical Scrubbing
Climb safely inside or use an extendable pole brush to scrub the walls from top to bottom. Focus heavily on structural joints, corners, and internal pipe connections where dark slime and algae love to anchor themselves. If you discover minor structural issues or cracks during this process, do not patch them immediately; complete the wash, dry the area completely, and procced with premium food-grade waterproof sealants later.
Step 4: Mud and Slurry Extraction
Mix the loose sediment from the walls into the floor water until it forms a uniform, muddy liquid slurry. Drop a small submersible sludge utility pump to the lowest point of the floor or use a basic manual bucket and mug to bail out this thick mud. Wipe the floor down with clean cellulose sponges until the surfaces are completely bone-dry.
Step 5: Uniform Disinfection Spraying
Mix a powerful sanitizing solution using fresh water and standard unscented household liquid bleach. For a standard 1,500-liter household poly tank, add roughly 200 to 250 ml of bleach to a clean bucket of water. Spray or brush this mixture across all internal surfaces. Let it sit untouched for exactly 30 to 45 minutes; this strict contact window is necessary to completely neutralize microscopic viral pathogens and deep fungal spores.
Step 6: Power Rinse and Re-commissioning
Wash the walls down completely with clean, fresh water to flush away all chemical trace residues. Ensure this highly chlorinated rinse water drains out through your dedicated waste lines—never let it run into your home’s regular kitchen or bathroom faucet lines, as it can ruin domestic inline purifiers. Once the drainage runs 100% transparent, close the waste valve, open the main incoming valve, and let your tank refill with clean water. Turn your electrical heaters and pumps back on.
Protect Your Household Water Grid
You don’t need to be trapped in a constant cycle of heavy scrubbing to keep your home’s water supply healthy. By investing a little bit of time into these simple ways to keep overhead water tank clean longer, you change your home’s environmental security profile completely. You protect your family from water-borne illnesses, keep your plumbing fixtures from getting clogged with sand, and save yourself from hours of exhausting manual labor.
Ready to take absolute control of your domestic infrastructure without the headaches? Download our free, printable overhead tank defense checklist directly from TankClean.site. You can also sign up for our automated maintenance newsletter to get timely seasonal alerts and expert advice on managing home filtration lines seamlessly. Explore our massive digital guide directory today and master your home hygiene like a pro!