Cost of Commercial Water Tank Cleaning vs DIY Home Cleaning: The Definitive Financial Guide

Compare the cost of commercial water tank cleaning vs DIY home cleaning. Find hidden costs, tool expenses, and step-by-step DIY instructions.
Cost of Commercial Water Tank Cleaning vs DIY Home Cleaning: Which Saves More Money Safely?
Let’s be completely honest for a moment. Nobody wakes up on a Saturday morning excited about the prospect of scrubbing sludge out of a dark, damp water reservoir. It is one of those household chores that stays buried at the bottom of the list until your tap water begins smelling funny or running a hazy shade of brown.
But here is the real talk about water safety: your overhead or underground storage setup is a biological clock. Over the months, it slowly collects fine dust particles, rust flakes, organic dirt, and micro-organisms that form a slimy layer of biofilm along the walls. Neglecting it doesn’t just damage your plumbing; it exposes your family to waterborne pathogens.
Look, I get it, scrubbing a tank is exhausting but you are left with a classic homeowner dilemma: do you call an industrial team or pull on some rubber boots and do it yourself? If you are trying to balance your household budget, understanding the actual cost of commercial water tank cleaning vs DIY home cleaning is essential. You don’t want to overpay for a simple residential rinse, but you also shouldn’t compromise your safety just to save a few pennies.
Here at TankClean.site, the ultimate destination for DIY water tank cleaning guides, maintenance tips, and water hygiene, we want to give you the raw financial truth. Let’s break down the true upfront expenses, the hidden operational costs, and the practical safety trade-offs of both options.

The Upfront Financial Breakdown: Professional vs. DIY
When evaluating the cost of hiring an industrial maintenance provider versus buying your own supplies, you have to look beyond just the immediate price tag.
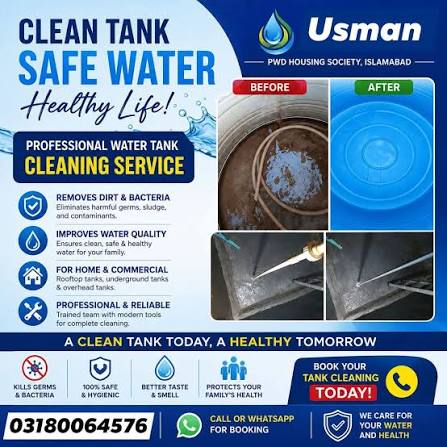
Commercial service companies calculate their fees based on total gallon capacity, physical location, tank material (plastic vs. concrete), and accessibility. For a typical residential property with an overhead plastic unit, booking a professional cleaning team usually ranges from 1,500 to 4,000 PKR, while deep cleaning large underground concrete systems scales upward from 5,000 to 10,000 PKR.
On the flip side, a DIY approach requires almost no structural labor fees, but it demands an initial investment in fundamental cleaning gear. If you don’t already own a chemical respirator or a long-handled brush, your first setup run will carry an upfront equipment cost.

Direct Expense Analysis: Commercial Services vs. Home DIY
To see exactly where your cash goes, review this comprehensive expenditure breakdown. It compares a single specialized commercial service callout against assembling a permanent, reusable domestic DIY kit at home.
| Financial Parameter | Commercial Cleaning Service (Single Visit) | Home DIY Cleaning Kit (One-Time Purchase) |
| Upfront Labor & Dispatch | 2,000 – 6,000 PKR (Recurring every visit) | 0 PKR (Your own physical time and effort) |
| Chemicals & Disinfectants | Included in contract package | 300 – 700 PKR (Bleach, vinegar, or detergents) |
| Safety Equipment | Provided by agency crew | 800 – 1,500 PKR (Mask, heavy gloves, goggles) |
| Mechanical Equipment | Commercial jet washers / industrial pumps | 0 PKR (Basic manual tool alternative used) |
| Water Testing Verification | Optional add-on (1,000 – 2,000 PKR) | 0 PKR (Visual baseline monitoring) |
| Total Financial Outlay | 2,000 – 8,000 PKR per clean | 1,100 – 2,200 PKR (Tools reusable for years) |
Hidden Costs and Risks Homeowners Often Overlook
Looking strictly at the numbers makes DIY seem like a slam-dunk victory, but there are distinct hidden factors that can tip the financial scales back toward a professional crew.
The Value of Personal Time
Cleaning a home storage unit properly isn’t a 20-minute job. Between isolating the lines, waiting for bulk water to drain, scrubbing down the structural surfaces, and executing the final flush, you will lose a minimum of 3 to 5 hours of your weekend. If your personal time is valuable, you have to weigh that physical investment against the simple convenience of paying an outsourced crew.
Asset Integrity and Structural Damage
Commercial operators understand the physical limitations of high-density polyethylene (HDPE) and concrete sealants. If an untrained homeowner uses a highly abrasive steel scraper or pours concentrated, raw chemicales directly onto a plastic liner, they can crack the structure or cause chemical degradation. Replacing a broken 1,000-gallon roof tank can easily run you over 20,000 PKR—completely erasing any small cash savings you achieved by skipping professional assistance.
Water Waste Financial Loss
Professional technicians bring high-capacity submersible pumps that drain massive units in under ten minutes, minimizing system downtime. A DIYer relying on slow domestic gravity lines or manual buckets often ends up wasting hundreds of gallons of usable water because they failed to coordinate their building storage drawdowns correctly before the project started.
Step-by-Step Low-Cost Home DIY Cleaning Process
If you have decided that you want to keep your hard-earned cash in your wallet, you can pull off an expert-level clean on your own. Follow this structured protocol to procced safely and efficiently without costly errors.
Step 1: Manage Your Water Drawdown
Don’t dump a full tank down the drain—that’s literal money fading away. Two days before your planned maintenance window, turn off your main supply line or well pump. Let your household naturally consume the stored water for laundry, dishes, and flushing until the tank level drops down to the final few inches.
Step 2: Total Network Isolation
Before touching a single brush, close the main distribution outlet valve leading into your home’s internal pipe system. This step is completely critical: it ensures that all the thick, muddy sludge you stir up during the manual scrubbing phase cannot flow down into your interior lines, keeping your plumbing free of unexpected clogs.
Step 3: Sludge Scraping and Extraction
Put on your protective gloves and safety mask. Take a stiff-bristled nylon brush and scrub the interior walls from top to bottom. If your tank has a wide access port, work from the outside using an extension pole to avoid climbing into a confined area. Collect the thick mud slurry at the bottom using a clean plastic scoop and a bucket.
Step 4: Microscopic Disinfection
Once the visible mud is gone, you must sanitize the interior plastic surfaces. Prepare an affordable, highly effective solution using standard liquid household bleach by mixing 1 cup of unscented bleach with 5 gallons of water. Apply it evenly to the interior walls with a sponge or garden sprayer and let it sit for 30 minutes to eradicate any lingering bacteria colonies.
Step 5: The Final Purge and Flush
Rinse the internal walls thoroughly with fresh water until the strong chemical smell completely disappears. Pump out this rinse water entirely. Open your primary inlet valve, let the tank fill with clean water, and then run your indoor household taps for two minutes to clear out any small air pockets trapped in their system lines.
Pro-Tips for Maximizing Your Home Maintenance Savings
To keep the cost of commercial water tank cleaning vs DIY home cleaning as low as possible over the long run, focus on preventative maintenance.
Installing a reliable sediment pre-filter on your main incoming waterline is an absolute game changer. It catches the fine sand, mud, and pipe rust before it ever enters your storage asset. This simple addition can extend your required cleaning intervals from every six months to once every two years, dramatically lowering your lifetime maintenance expenses.
Additionally, ensuring your storage lid is completely airtight stops sunlight from triggering rapid algae blooms and prevents local pests from turning your drinking water into a hazardous environment.
Take Control of Your Budget and Water Health Today
At the end of the day, managing your household assets shouldn’t cost a fortune. While industrial crews are necessary for complex commercial facilities or severely contaminated spaces, a standard residential plastic tank can be safely and affordably managed right at home with the correct DIY approach.
Don’t let deferred maintenance lead to costly emergency plumbing fees or health issues for your loved ones. Head directly over to TankClean.site now to download our free Ultimate Home Water Hygiene Checklist and Budget Log to streamline your next project.
While you are visiting, sign up for our seasonal maintenance email reminders so you always know exactly when it is time to check your system. Explore our complete directory of step-by-step DIY restoration guides today to keep your domestic water crisp, pure, and incredibly affordable!