
Learn how to safely handle water tank cleaning chemicals at home. Master protective gear, toxic mixing rules, and safe step-by-step DIY flushing.
How to Safely Handle Water Tank Cleaning Chemicals
Clean domestic water is something we all take for granted until the water coming out of our faucets starts looking hazy or smelling strange. When it is time to refresh your storage system, rolling up your sleeves and doing it yourself can save you a massive amount of cash. Look, I get it, scrubbing a tank is exhausting but it is a vital chore that keeps your household safe from dangerous pathogens. However, there is a major catch. To truly sanitize an overhead or underground reservoir, you have to use potent disinfectants. If you do not know how to safely handle water tank cleaning chemicals, a simple maintenance weekend can quickly turn into a hazardous medical emergency.
Here is the real talk about water safety: the chemicales we use to destroy bacteria are highly toxic in their raw, concentrated forms. Strong bleaches, chlorine powders, and acid-based descalers can emit fumes that overwhelm you in confined spaces or cause severe chemical burns on bare skin.
At TankClean.site, we focus on helping homeowners execute their own home maintenance safely and efficiently without paying for premium commercial services. Let us break down everything you need to know to handle these powerful sanitizing agents with absolute confidence.
The Core Risks of Tank Disinfection Chemicals
Before you crack open a bottle of industrial bleach or a jar of chlorine powder, you need to understand exactly what you are up against. Most household water tank setups are enclosed spaces with minimal natural ventilation. When you introduce chemical solutions into a confined zone, the risk factor multiplies significantly.
Chemical Burns and Skin Irritation
Concentrated sodium hypochlorite (liquid bleach) and calcium hypochlorite (chlorine powder) are highly corrosive. A single accidental splash on your bare arms or into your eyes can cause permanent tissue damage.
Respiratory Distress from Toxic Fumes
In an enclosed overhead or underground tank, chemical vapors trap easily. Inhaling concentrated chlorine fumes can cause immediate irritation to your throat and lungs, leading to violent coughing fits or chemical pneumonitis in severe cases.
Lethal Chemical Reactions
The absolute golden rule of home maintenance is to never mix different cleaning products. Combining chlorine bleach with an acid-based cleaner or ammonia creates chloramine gas. This gas is highly toxic and can knock an adult unconscious within a matter of seconds.
Personal Protective Equipment (PPE) Checklist
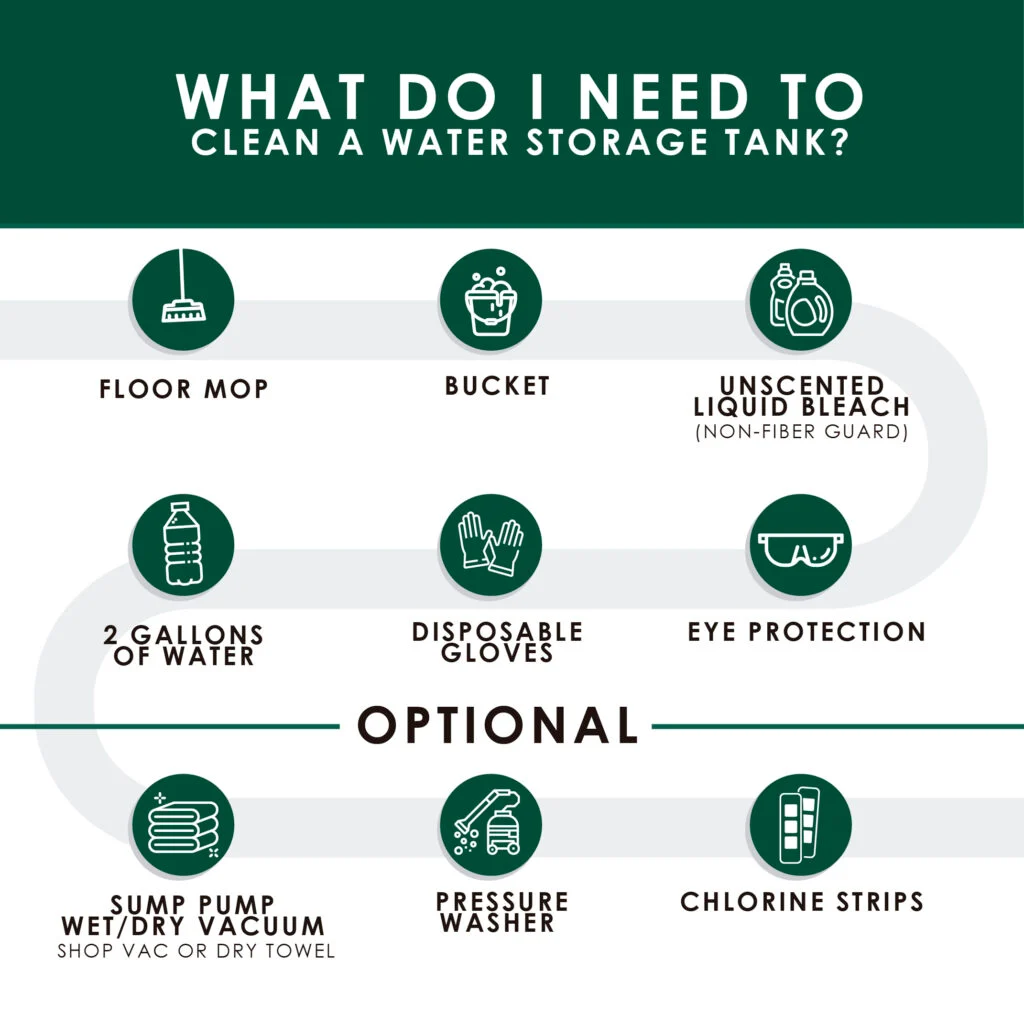
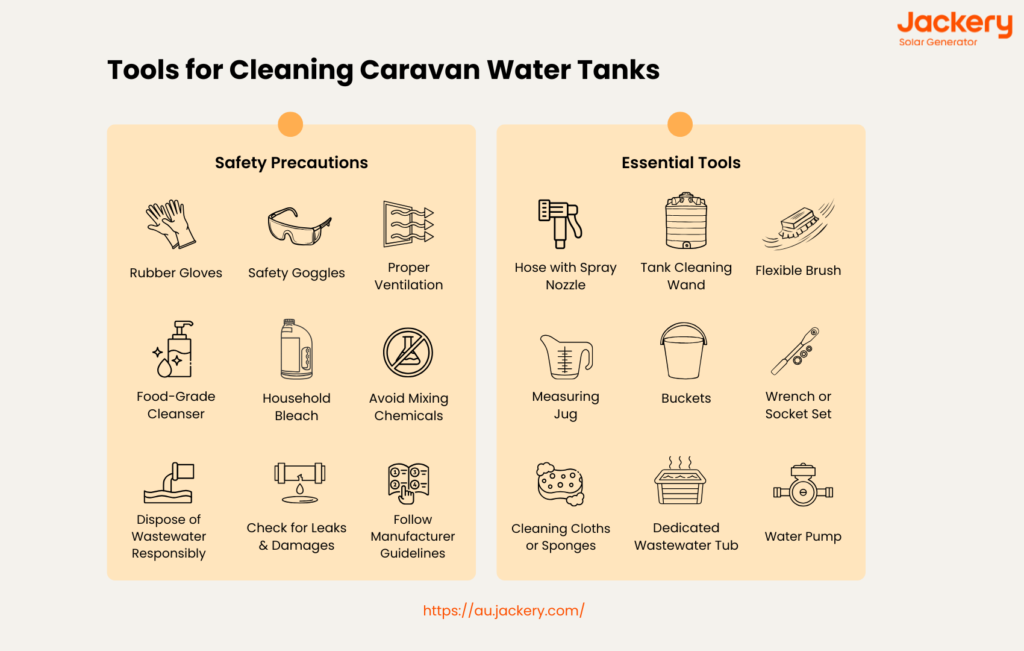
You wouldn’t enter a construction zone without a hard hat, so don’t handle strong sanitizing mixtures without the proper protective gear. Before starting your DIY session, gather the protective tools outlined below.
| PPE Item | Minimum Requirement | Why It Is Mandatory |
| Safety Goggles | Sealed splash-proof goggles | Protects your eyes from rogue droplets during high-pressure spraying or chemical mixing. |
| Respirator Mask | N95 mask or a dedicated chemical cartridge respirator | Filters out harmful volatile organic vapors and airborne chlorine gas in closed spaces. |
| Heavy-Duty Gloves | Elbow-length nitrile or PVC chemical-resistant gloves | Prevents concentrated chemical mixtures from burning or absorbing through your skin. |
| Protective Footwear | Rubber boots with non-slip treads | Keeps your feet dry while navigating slick, wet tank floors and resists chemical runoff. |
| Clothing Coverage | Full-length sleeves and long pants (or disposable coveralls) | Ensures zero bare skin is exposed to falling splashes while cleaning overhead sections. |
Having the right gear ready ensures you can work smoothly without constantly worrying about accidental contact.
Step-by-Step Guide: Preparing, Mixing, and Using Chemicals Safely
Now that you have your safety equipment sorted out, let us walk through the exact, logical sequence required to handle these sanitizing solutions correctly from start to finish.
Step 1: Isolate the Entire Water Network
Before any chemicals are opened, turn off the main water inlet valve feeding into the storage tank. Close the primary distribution outlet that connects to your home’s indoor plumbing system. This prevents raw chemical solutions from traveling down into your water pipes while you are still working inside the reservoir. Inform everyone in your household that water lines will be completely offline for the next few hours.
Step 2: Ensure Maximum Ventilation
If you are cleaning an overhead plastic tank, remove the main inspection lid completely and let air circulate for 15 minutes. For underground concrete tanks, set up a portable electric fan right at the entrance hatch to blow fresh air down into the space. Never step foot inside a tank if you can smell stagnant pockets of gas or intense humidity without active air movement.
Step 3: Master the Dilution Math
Always add your chemical to water—never add water directly to raw chemical powder or concentrated liquid. Adding water to a pile of chlorine powder can cause a sudden, violent chemical splashback.
For standard household liquid bleach (typically 5% strength), the goal is to create a sanitizing solution of roughly 50 parts per million (PPM) for a thorough deep clean. To achieve this, use a ratio of 1 liter of liquid bleach for every 1,000 liters of water your tank can hold. Mix this solution carefully in an open, outdoor space before introducing it into the tank environment.
Step 4: Apply the Sanitizer and Respect Contact Time
Using a clean spray pump or a long-handled mop, apply the diluted chlorine solution evenly across the internal walls, joints, and floor surfaces. Do not use an atomized mist sprayer, as this creates tiny airborne chemical droplets that are very easy to breathe in by accident. Once the solution is applied, exit the tank and allow a contact time of 2 to 4 hours. This gives the chlorine enough time to completely destroy stubborn bacterial biofilms and algae root systems.
Step 5: Flush and Clean the Entire System
Once the disinfection period has procced, use a submersible utility pump to empty the heavily treated water out of the tank. Route the discharge line straight into a dedicated sewage drain. Do not let this water drain onto your garden lawn or landscaping, as high chlorine concentrations will instantly kill grass and ruin soil ecosystems.
Refill the tank one-quarter of the way with fresh water, rinse down the interior walls thoroughly to remove any lingering chemical droplets, and pump that rinse water out as well.
Step 6: Test the Residual Chemical Levels
Refill your tank completely with fresh water. To confirm the water is perfectly safe for daily household tasks, go inside and run your faucets for 5 minutes. Take a sample of water in a clean bucket and use a standard pool chlorine test strip to check the levels.
The safe residual level for drinking and bathing must be between 0.2 and 2.0 parts per million (PPM). If your test strips read higher than 4.0 PPM, your water lines still contain too much chemical volume; simply open your outdoor taps to run more fresh water through the network until the level drops into the safe zone.
Critical Mistakes to Avoid in DIY Chemical Handling
Even experienced DIYers can make simple errors if their drop their guard. Watch out for these common blunders during your next maintenance session:
- Storing Unused Chemicals inside the Tank Area: Never leave extra bottles of bleach or open jars of chlorine powder sitting on top of or near your water tank. The rising moisture can cause containers to degrade, leading to toxic chemical leaks right next to your clean water supply.
- Pouring Bleach into a Muddy Tank: If your tank has a 2-inch layer of mud and silt at the bottom, do not just pour bleach inside hoping it will fix everything. Chlorine naturally binds to organic soil particles, which completely destroys its sanitizing power before it ever reaches the dangerous bacteria hiding underneath the mud layer. Always scrub away the mud with clean water first!
- Working Completely Alone: When working with strong water treatment chemicales in confined or elevated spaces, always have a spotter outside the tank. If you slip or feel dizzy from fumes, you need someone readily available who can immediately assist you or call for help.
Your Home Hub for Expert Water Hygiene
Learning how to safely handle water tank cleaning chemicals doesn’t mean you need a professional degree in chemistry. By respecting the strength of the products, wearing proper protective layers, and following correct dilution ratios, you can execute a flawless, commercial-grade sanitation project completely on your own terms.
For more actionable checklists, hardware buying recommendations, and expert maintenance advice, explore the complete learning center here at TankClean.site. We make it easy for everyday homeowners to protect their water quality without paying premium professional prices.
Ready to tackle your next maintenance weekend safely? Download our free DIY Water Tank Safety & Chemical Concentration Chart today to get exact measurements for your tank size, or subscribe to our mailing list below to receive automated seasonal cleaning reminders and expert home care tips straight to your inbox!