
Stop disease-carrying mosquitoes from invading your home water supply. Learn how to prevent mosquito breeding in water storage tank systems safely.
How to Prevent Mosquito Breeding in Water Storage Tank
Stagnant water is an open invitation for mosquitoes. Whether you have an overhead plastic tank baking under the sun or a concrete tank buried deep underground, it is easy to forget that your primary water supply can quickly double as a massive nursery for disease-carrying pests. Look, I get it, climbing up on the roof or checking an underground hatch every single week is exhausting, but leaving your domestic water supply unprotected is a risk you simply cannot afford to take.
When pests move in, they do not just threaten your comfort—they actively jeopardize your household’s health with threats like Dengue, Zika, and West Nile virus. Learning how to prevent mosquito breeding in water storage tank installations is one of the most vital home maintenance habits you can develop.
Here at TankClean.site, we give you the real talk about water safety. You do not need to spend thousands of rupees or dollars hiring expensive professional services to keep your water free from wriggling larvae. With a few simple modifications, basic household tools, and some strategic preventative maintenance, you can completely fortify your home’s water network all on your own.
The Mosquito Lifecycle in Stagnant Water
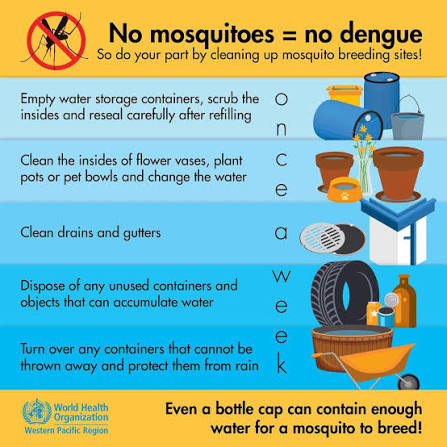
To successfully beat mosquitoes at their own game, you have to understand how they use your water storage infrastructure. A single female mosquito can lay up to 200 eggs at a time directly on the surface of stagnant water or along the damp internal walls of your tank.
Within 24 to 48 hours, these eggs hatch into aquatic larvae, commonly known as “wigglers.” These larvae feed on microscopic organic matter, algae, and sediment inside your tank. If your water storage tank has a thick layer of mud at the bottom, you are essentially providing a free buffet for these pests. Within a week, they pupate and emerge as flying, biting adults ready to invade your bedrooms and living spaces. Your mission is simple: break this cycle by cutting off their access and eliminating their food supply.
Physical Barriers vs. Chemical Treatments
When looking into how to prevent mosquito breeding in water storage tank systems, you have two primary lines of defense: physical barriers that stop adult mosquitoes from entering, and safe chemical or biological treatments that neutralize larvae if an invasion does occur.
| Method Type | Specific Strategy | How It Works | Long-Term Effectiveness |
| Physical Barrier | Stainless Steel Wire Mesh (Mesh Size < 1mm) | Installed over air vents and overflow pipes to physically block adult mosquitoes from entering. | High; lasts for years if mesh is corrosion-resistant. |
| Physical Barrier | Airtight Threaded Lids & Rubber Gaskets | Seals the main inspection hatch completely so no insects can crawl or fly through the cracks. | High; completely eliminates the primary entry point. |
| Biological Treatment | Mosquito Dunks (BTI Bacteria) | Releases a natural bacterium (Bacillus thuringiensis israelensis) that kills larvae but keeps water safe for humans. | Moderate; requires replacement every 30 days. |
| Chemical Treatment | Routine Shock Chlorination | Uses household bleach to eliminate organic matter, biofilm, and algae, starving any existing larvae. | High; cleans the environment but requires temporary water shutdown. |
While chemicales like bleach are great for emergency remediation, a mechanical, physical barrier is always your best long-term bet for everyday protection. Let us walk through the exact DIY process to clean out an infested tank and set up an unbreachable defense network.
Step-by-Step Guide: How to Clean, Disinfect, and Bug-Proof Your Tank
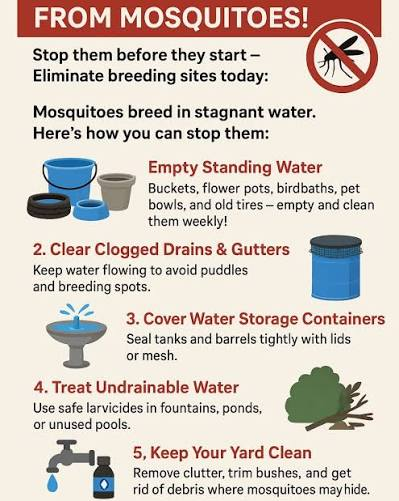
If you open your tank lid and notice tiny, worm-like organisms swimming near the surface, your tank is already breached. Do not procced to use the water inside the house. Follow this comprehensive step-by-step blueprint to reclaim your water hygiene.
Step 1: Drain and Isolate Your Water Supply
Shut off the main inlet pipe supplying water to your storage tank. Close the main distribution valve leading into your household plumbing network to ensure no larvae or contaminated water enter your indoor taps. Use a submersible utility pump with a long discharge hose to drain the entire volume of water directly into an outside sewage drain. Do not dump this water onto your lawn, as the larvae can survive in damp puddles.
Step 2: The Physical Biofilm and Mud Removal
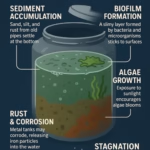
Mosquito larvae need organic matter to survive. Put on rubber boots, safety goggles, and a protective face mask. Climb inside the tank or use an extension pole brush through the manhole. Scrub the internal walls, joints, and floor thoroughly using fresh water and a stiff nylon brush. You must remove the slimy biofilm and the layer of bottom sediment where organic nutrients accumulate. Once the scrubbing is complete, pump out all the dirty, muddy residue until the tank floor is totally dry.
Step 3: Apply Shock Chlorination to Sanitize
To ensure any microscopic eggs stuck to the walls are fully destroyed, you must disinfect the tank. Fill the tank with fresh water and add standard, unscented household liquid bleach. Use a ratio of roughly 200 to 250 milliliters of bleach for every 1,000 liters of tank capacity. Let this chlorinated solution sit completely undisturbed for 4 to 6 hours to completely sanitize the interior environment.
Step 4: Secure the Overflows and Air Vents
While the chlorine is sanitizing the water, it is time to install your physical defenses. Take a close look at your tank’s overflow pipe and air vents—these are the most common entry points because homeowners assume their main lid is enough.
Measure the diameter of your overflow pipe. Cut a piece of high-grade, stainless steel mosquito mesh (ensure the holes are smaller than 1 millimeter so tiny mosquitoes cannot squeeze through). Secure the mesh tightly over the opening of the overflow pipe using a stainless steel hose clamp or heavy-duty zip ties. Repeat this process for any open air vents.
Step 5: Fix and Seal the Main Inspection Lid
Check the main lid of your tank. If it is a plastic overhead tank, ensure the threads are not stripped and the lid screws on perfectly flush. If it is an underground concrete tank, inspect the heavy iron or concrete manhole cover. If there are visible gaps around the edges, apply a weather-resistant rubber gasket strip along the rim to create a true airtight seal.
Step 6: Empty, Refill, and Conduct Safe Testing
After the disinfection contact time has passed, pump out the heavily chlorinated water completely through your drainage line. Refill the tank with clean, fresh water from your municipal line or well pump. Open your household faucets for 5 minutes to clear out any old water from the lines.
To ensure the water is completely safe for daily consumption, use a basic chlorine test strip. The free chlorine level should read between 0.2 and 2.0 parts per million (PPM) before your family uses it for drinking or bathing.
Strategic Mistakes to Avoid in Tank Defense
Even the most dedicated DIY homeowners occasionally fall into a few traps. Here is the real talk about what can go wrong if you overlook the details:
- Using Standard Window Screen Mesh: Plastic or fiberglass window screening degrades incredibly fast under direct UV sunlight. Within a few months, it will crack and develop small holes, allowing pests right back inside. Always use marine-grade stainless steel mesh.
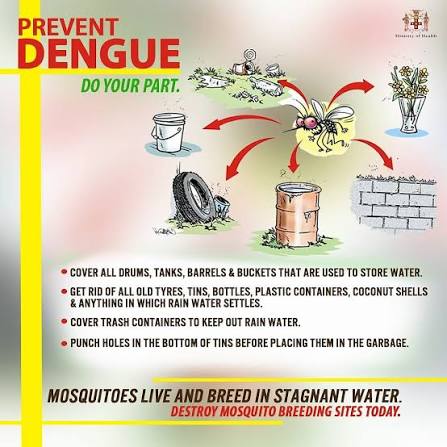
- Neglecting the Tank Surroundings: If puddles of water accumulate right next to your underground tank lid due to bad drainage, mosquitoes will breed their first. When you open the lid for a quick look, dozens of adult mosquitoes will fly directly inside. Keep the exterior area clean, dry, and free of dense weeds.
- Assuming Tightly Closed Means Sealed: Mosquitoes are incredibly persistent; if they can smell the moisture rising through a gap as thin as a coin, they will find a way in. Check your seals with a flashlight at night—if light leaks out, insects can leak in.
Your Trusted Guide for Complete Domestic Water Hygiene
You should never have to worry about hidden pests contaminating the water your family uses to cook, bathe, and drink. Protecting your home from mosquito breeding is not a difficult task, but it does require regular vigilance and high-quality physical barriers.
For more specialized DIY cleaning checklists, hardware recommendations, and water safety resources, explore our extensive library right here on TankClean.site. We are constantly creating accessible, expert-backed content to help you maintain a pristine home environment without breaking the bank.
Ready to completely protect your water storage network this season? Download our free Ultimate Home Water Tank Bug-Proofing & Inspection Guide today to get a breakdown of the exact mesh sizes and materials for your setup, or subscribe to our monthly newsletter below to receive seasonal maintenance notifications right before the peak breeding season hits!